Make a Sorting Machine
Design, build and program a machine that can identify at least three different colours of LEGO® elements and sort them into separate locations.

Lesson plan
Prepare
- Read through this teacher material.
- If you feel that it is necessary, plan a lesson using the getting started material in the EV3 Lab Software or EV3 Programming App. This will help to familiarise your pupils with LEGO® MINDSTORMS® Education EV3.
Engage (30 Min.)
- Use the ideas in the Ignite a Discussion section below to engage your pupils in a discussion relating to this project.
- Explain the project.
- Divide your class into teams of two pupils.
- Allow your pupils some time to brainstorm.
Explore (30 Min.)
- Have your pupils create multiple prototypes.
- Encourage them to explore both building and programming.
- Have each pair of pupils build and test two solutions.
- Provide the pupils with cups or other containers for holding the sorted objects.
Explain (60 Min.)
- Ask your pupils to test their solutions and to choose the best one.
- Make sure that they can create their own testing tables.
- Allow some time for each team to finalise their project and to collect assets for documenting their work.
Elaborate (60 Min.)
- Allow your pupils some time to produce their final reports.
- Facilitate a sharing session in which each team presents their results.
Evaluate
- Provide feedback on each pupil's performance.
- In order to simplify the process, you can use the assessment rubrics that have been provided.
Ignite a Discussion
Sorting machines can sort objects based on properties, such as size, weight, quality or colour. They use a variety of sensors to detect these properties and then sort each object into the correct category.
Encourage an active brainstorming process.
Ask your pupils to think about these questions:
- Which colours will you sort?
- Which element sizes will you sort?
- Which type of motorised mechanism is able to move these elements?
- How can the machine sense different locations?
- What design features will ensure that the machine’s movements are accurate and repeatable?
Encourage your pupils to document their initial ideas and to explain why they chose the solution that they will use for their first prototype. Ask them to describe how they will evaluate their ideas throughout the project. That way, when they are reviewing and revising, they will have specific information that they can use to evaluate their solution and decide whether or not it was effective.
Extensions
Language Arts Extension
Option 1
To incorporate the development of language arts, have your pupils:
- Use their written work, sketches and/or photos to summarise their design process and create a final report
- Create a video demonstrating their design process starting with their initial ideas and ending with their completed project
- Create a presentation about their program
- Create a presentation that connects their project with real-world applications of similar systems and describes new inventions that could be made based on what they have created.
Option 2
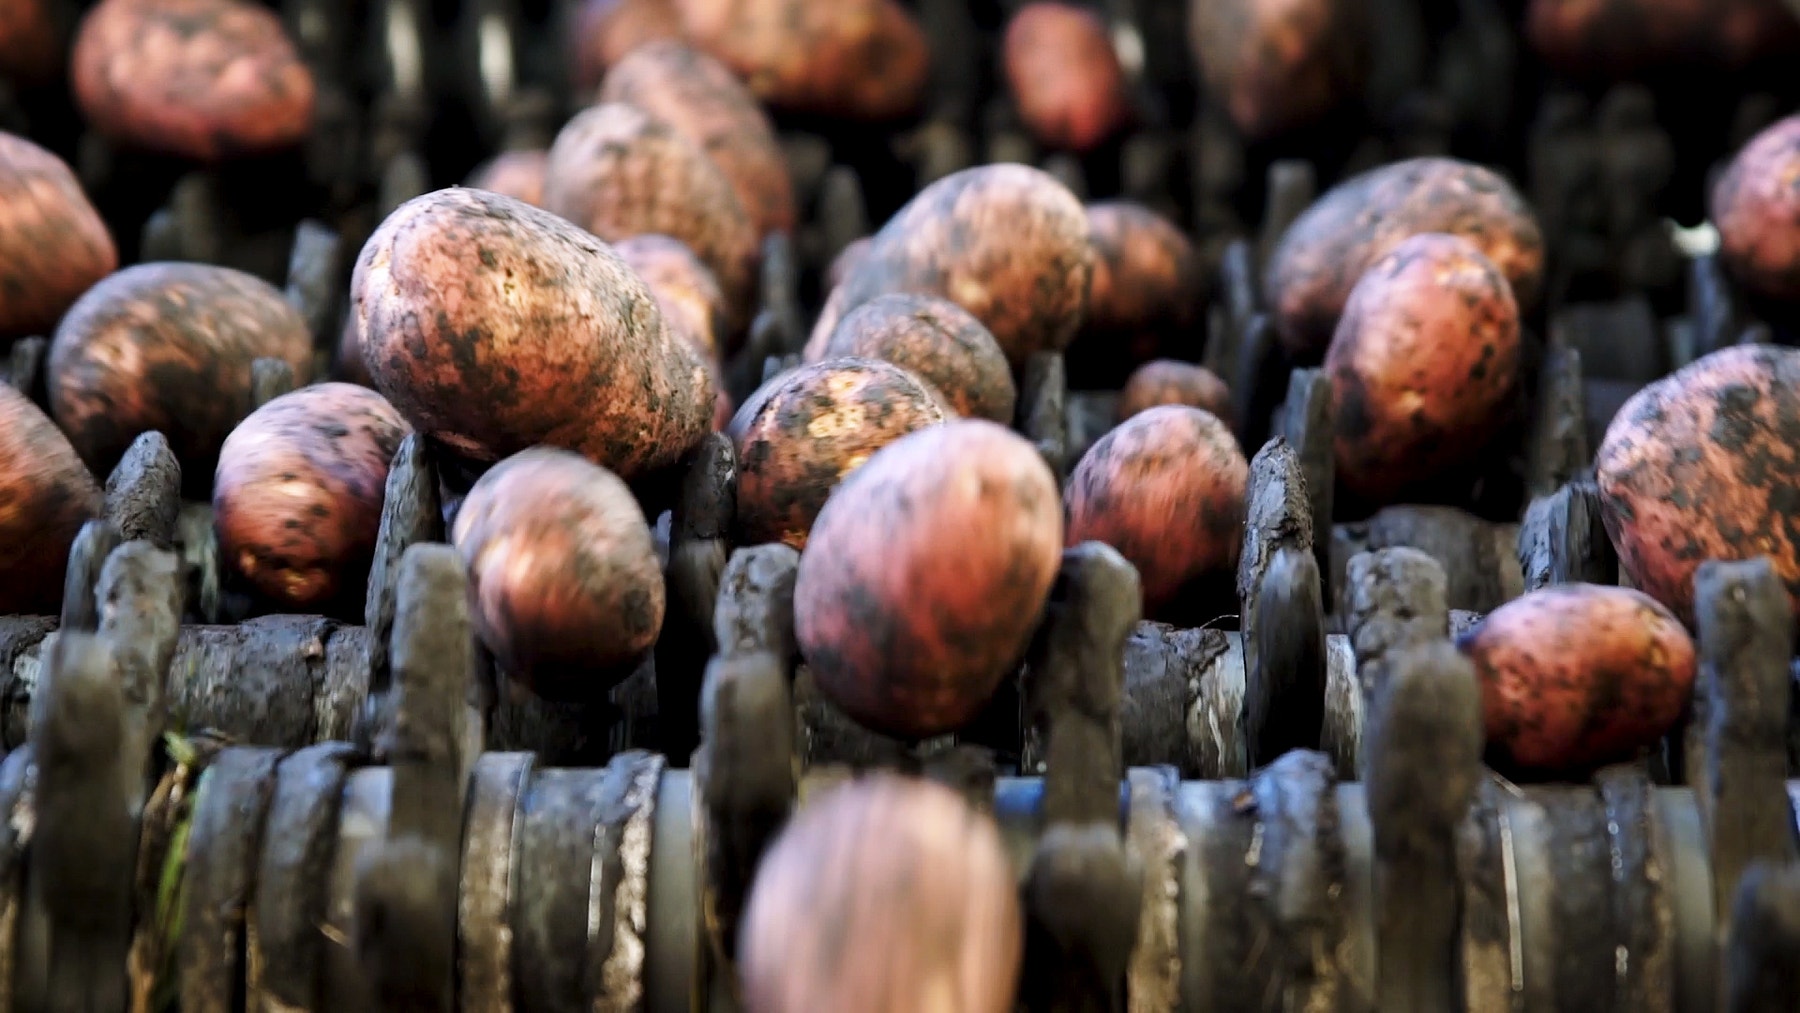
In this lesson, your pupils created a sorting machine. The food and farming industries use sorting machines to manage large-scale product production and distribution.
To incorporate the development of language arts, have your pupils:
- Describe the scale of their local and regional food production or farming industries
- Choose a specific food or farm product at a specific scale ranging from small business/farm to national or global level production, and research cybersecurity issues relating to the food and farming industries (e.g. how to ensure safe and reliable food production)
Maths Extension
In this lesson, your pupils built a robotic sorting machine that sorted objects based on colour. Machine learning is a technique engineers can use to build machines that sort objects according to differences that are even more complex than colour. To achieve this, developers use a machine learning process called classification.
To incorporate the development of maths skills and explore the machine learning process called classification, have your pupils:
- Collect some sortable objects (e.g. rocks, varieties of fruit, bracelets) and then populate a data table listing observable qualitative and quantitative differences between the objects
- Define what observable differences would lead to ‘desired’ vs ‘not desired’ (e.g. weight, colour, size, imperfections) sorting criteria for any single category of objects
- Propose and possibly build a new sorting design and programming algorithm for their robots that would enable them to sort based on additional characteristics such as size or weight
Building Tips
Building Ideas
Allow your pupils the opportunity to build some of the examples from the links below. Encourage them to explore how these systems work and to brainstorm how these systems could inspire a solution to the Design Brief.
Testing Tips
Encourage your pupils to design their own test setup and a procedure for selecting the best solution. These tips can help your pupils as they set up their test:
- Mark the location where the machine should place the objects.
- Use cups or other containers to hold the sorted objects.
- Create testing tables for recording your observations.
- Evaluate the precision of your machine by comparing the expected results with the actual results.
- Repeat the test at least three times.
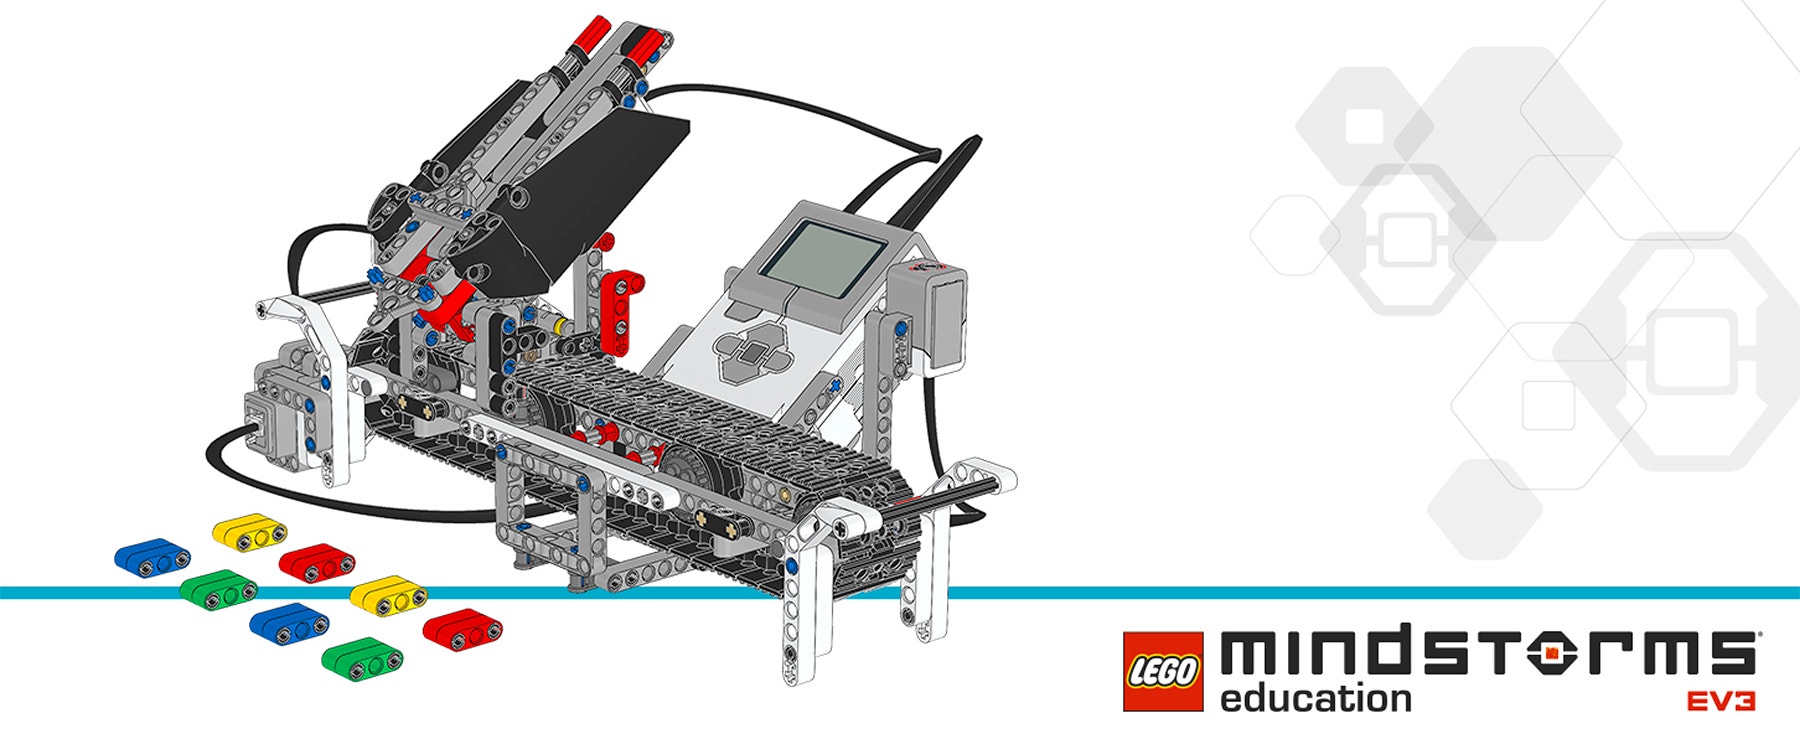
Sample Solution
Here is a sample solution that meets the Design Brief criteria:

Coding Tips
EV3 MicroPython Sample Program
#!/usr/bin/env pybricks-micropython

from pybricks import ev3brick as brick
from pybricks.ev3devices import Motor, TouchSensor, ColorSensor
from pybricks.parameters import (Port, Button, Color, ImageFile,
                                 SoundFile)
from pybricks.tools import wait

# The Color Squares are red, green, blue, or yellow.
POSSIBLE_COLORS = (Color.RED, Color.GREEN, Color.BLUE, Color.YELLOW)

# Configure the belt motor with default settings.  This motor drives
# the conveyor belt.
belt_motor = Motor(Port.D)

# Configure the feed motor with default settings.  This motor ejects
# the Color Squares.
feed_motor = Motor(Port.A)

# Set up the Touch Sensor.  It is used to detect when the belt motor
# has moved the sorter module all the way to the left.
touch_sensor = TouchSensor(Port.S1)

# Set up the Color Sensor.  It is used to detect the color of the Color
# Squares.
color_sensor = ColorSensor(Port.S3)

# This is the main part of the program.  It is a loop that repeats
# endlessly.
#
# First, it moves the 2 motors to their correct starting positions.
# Second, it waits for you to scan and insert up to 8 Color Squares.
# Finally, it sorts them by color and ejects them in their correct
# positions.
#
# Then the process starts over, so you can scan and insert the next set
# of Color Squares.
while True:
    # Initialize the feed motor.  This is done by running the motor
    # forward until it stalls.  This means that it cannot move any
    # further.  From this end point, the motor rotates backward by 180
    # degrees.  This is the starting position.
    feed_motor.run_until_stalled(120)
    feed_motor.run_angle(450, -180)

    # Initialize the conveyor belt motor.  This is done by first
    # running the belt motor backward until the Touch Sensor is
    # pressed.  Then the motor stops and the angle is reset to "0."
    # This means that when it rotates backward to "0" later on, it
    # returns to this starting position.
    belt_motor.run(-500)
    while not touch_sensor.pressed():
        pass
    belt_motor.stop()
    wait(1000)
    belt_motor.reset_angle(0)

    # Clear all the contents from the Display.
    brick.display.clear()

    # Scanning a Color Square stores the color in a list.  The list is
    # empty to start.  It will grow as colors are added to it.
    color_list = []

    # This loop scans the colors of the objects.  It repeats until 8
    # objects are scanned and placed in the chute.  This is done by
    # repeating the loop while the length of the list is less than 8.
    while len(color_list) < 8:
        # Display an arrow that points to the Color Sensor.
        brick.display.image(ImageFile.RIGHT)

        # Display how many Color Squares have been scanned so far.
        brick.display.text(len(color_list))

        # Wait until the Center Button is pressed or a Color Square is
        # scanned.
        while True:
            # Store "True" if the Center Button is pressed or "False"
            # if not.
            pressed = Button.CENTER in brick.buttons()
            # Store the color measured by the Color Sensor.
            color = color_sensor.color()
            # If the Center Button is pressed or one of the possible
            # colors is detected, break out of the loop.
            if pressed or color in POSSIBLE_COLORS:
                break

        if pressed:
            # If the button was pressed, end the loop early.  It will
            # no longer wait for any Color Squares to be scanned and
            # added to the chute.
            break
        else:
            # Otherwise, a color was scanned, so it is added (appended)
            # to the list.
            brick.sound.beep(1000, 100, 100)
            color_list.append(color)

            # It should not register the same color again if it is
            # still looking at the same Color Square.  So, before
            # continuing, wait until the sensor no longer sees the
            # Color Square.
            while color_sensor.color() in POSSIBLE_COLORS:
                pass
            brick.sound.beep(2000, 100, 100)

            # Display an arrow pointing down and wait 2 seconds to
            # allow some time to slide the Color Square into the
            # motorized chute.
            brick.display.image(ImageFile.BACKWARD)
            wait(2000)

    # Play a sound and display an image to indicate that scanning is
    # complete.
    brick.sound.file(SoundFile.READY)
    brick.display.image(ImageFile.EV3)

    # Now sort the bricks using the list of colors that have been
    # stored.  Do this by looping over each color in the list.
    for color in color_list:

        # Wait for 1 second between each sorting action.
        wait(1000)

        # Run the conveyor belt motor to the position that corresponds
        # to the stored color.
        if color == Color.BLUE:
            brick.sound.file(SoundFile.BLUE)
            belt_motor.run_target(500, 10)
        elif color == Color.GREEN:
            brick.sound.file(SoundFile.GREEN)
            belt_motor.run_target(500, 132)
        elif color == Color.YELLOW:
            brick.sound.file(SoundFile.YELLOW)
            belt_motor.run_target(500, 360)
        elif color == Color.RED:
            brick.sound.file(SoundFile.RED)
            belt_motor.run_target(500, 530)

        # Now that the conveyor belt is in the correct position, eject
        # the colored object.
        feed_motor.run_angle(1500, 90)
        feed_motor.run_angle(1500, -90)
Career Links
The pupils who enjoyed this lesson might be interested in exploring these career pathways:
- Agriculture and Horticulture (Agricultural Mechanics and Technology)
- Manufacturing and Engineering (Machine Technology)
Assessment Opportunities
Teacher Observation Checklist
Create a scale that suits your needs, for example:
- Partially accomplished
- Fully accomplished
- Overachieved
Use the following success criteria to evaluate your pupils' progress:
- The pupils are able to evaluate competing design solutions based on prioritised criteria and trade-off considerations.
- The pupils are autonomous in developing a working and creative solution.
- The pupils are able to communicate their ideas clearly.
Self-Assessment
Once your pupils have collected some performance data, allow them a bit of time to reflect on their solutions. Help them by asking questions, like:
- Is your solution meeting the Design Brief criteria?
- Can your machine’s movement(s) be more accurate?
- What are some ways in which others have solved this problem?
Ask your pupils to brainstorm and document two ways in which they could improve their solutions.
Peer Feedback
Encourage a peer-review process in which each group is responsible for evaluating their own as well as others’ projects. This review process can help the pupils to develop skills in giving constructive feedback as well as sharpen their analytic skills and their ability to use objective data in order to support an argument.
Teacher Support
The pupils will:
-Use the design process to solve a real-world problem
LEGO® MINDSTORMS® Education EV3 Core Set
Cups or other containers to hold the sorted objects
Tape for marking locations
**National curriculum in England **
Design and technology programmes of study: key stage 3 (DFE-00192-2013)
• identify and solve their own design problems and understand how to reformulate problems given to them
• test, evaluate and refine their ideas and products against a specification, taking into account the views of intended users and other interested groups
• develop and communicate design ideas using annotated sketches, detailed plans, 3-D and mathematical modelling, oral and digital presentations and computer-based tools
• understand how more advanced electrical and electronic systems can be powered and used in their products [for example, circuits with heat, light, sound and movement as inputs and outputs]
• apply computing and use electronics to embed intelligence in products that respond to inputs [for example, sensors], and control outputs [for example, actuators], using programmable components [for example, microcontrollers].


