The Factory Robot
Design and build extensions onto the Driving Base and program it to complete two tasks.
Lesson plan
1. Prepare
- Read through the pupil material in the EV3 Classroom App.
- Collect information about the tasks performed by autonomous wheeled robots in factories and warehouses.
- You’ll need black electrician’s tape, marker pens, a tape measure and a large object to create the factory path for this lesson.
- It’s recommended that the pupils have completed the other lessons in this unit before beginning this challenge.
- In order to complete this lesson, the pupils will have to have built the Driving Base model, which will take about 30 minutes to complete.
- If you don’t have double-block class time, plan to run this lesson over multiple class sessions.
Part A
2. Engage (10 Min.)
- Use the ideas in the Ignite a Discussion section below to engage your pupils in a discussion related to this lesson.
- Divide your class into teams of two pupils.
3. Explore (35 Min.)
- Have your pupils brainstorm ideas for extending their Driving Bases to grab the Cuboid and release it at the centre of the target circle (i.e. the ‘drop-off zone’).
- Encourage them to create multiple prototypes, exploring both building and programming.
- Allow the pupils time to build and test their solutions.
Part B
4. Explain (10 Min.)
- Facilitate a discussion about the key functionalities that the robot uses to follow the line and stop in front of the large object.
5. Elaborate (35 Min.)
- Have your pupils brainstorm ideas for extending their Driving Bases to follow the line and stop as close as possible to the large object.
- Let them continue to work on their robots until they’re ready to complete the challenge.
- Don’t forget to leave some time for tidying up.
6. Evaluate
- Give feedback on each pupil’s performance.
- Evaluate the creativity of their solution and how well their team worked together.
- To simplify the process, you can use the assessment rubrics that have been provided.
Ignite a Discussion
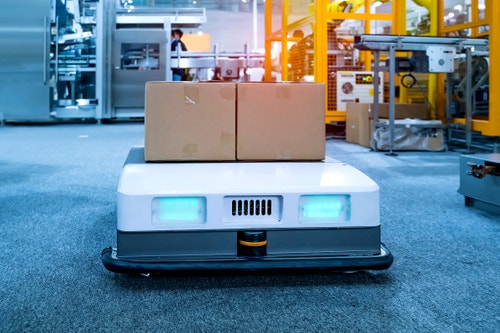
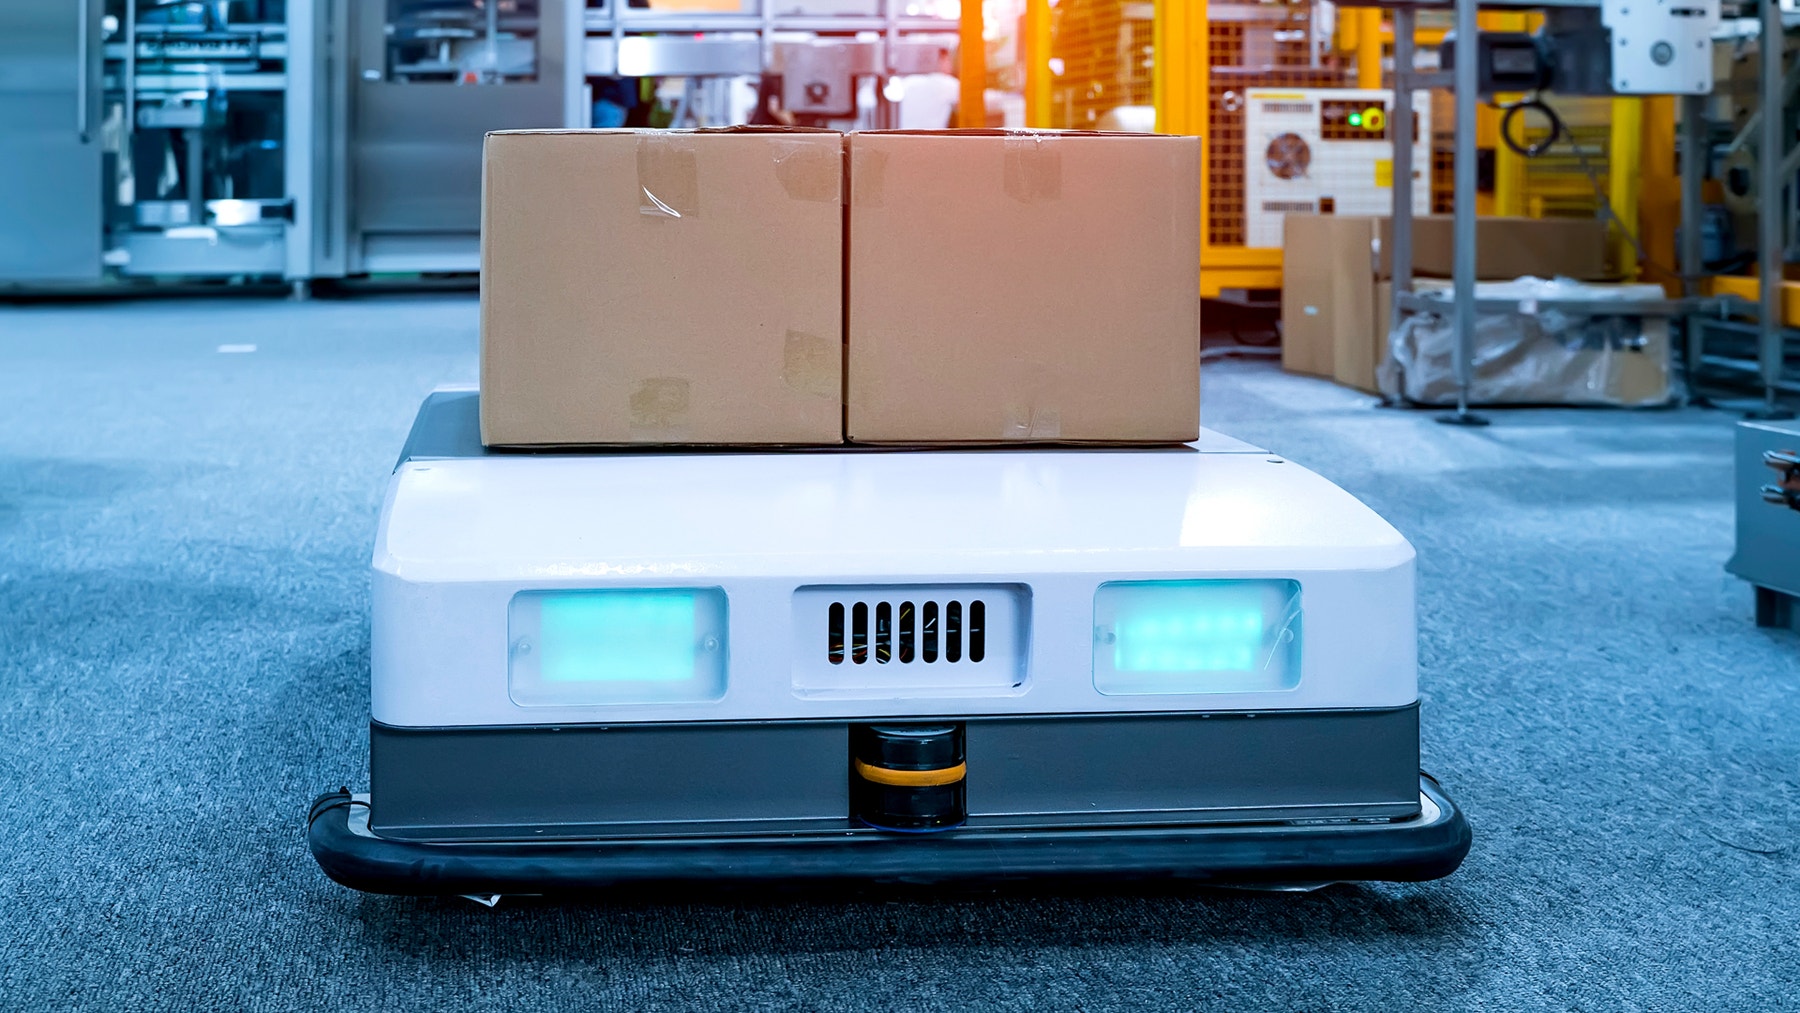
One of the tasks of the autonomous wheeled robots in the LEGO® factory is moving boxes between the different work stations. These fully autonomous robots even find their own way to a charging station when their batteries are low! They perform their tasks efficiently, without bumping into walls, people or other robots.
Use these questions to engage your pupils in a discussion about how the Driving Base could perform tasks that are similar to those of the LEGO factory robots:
- Do you think the Driving Base could be used to perform tasks that are similar to those of the LEGO factory robots?
- Which of the extensions from the previous lessons would be useful in performing these tasks?
Project Brief
Design and build extensions to your Driving Base and program it to:
- Grab the Cuboid and bring it as close as possible to the centre of the target circle and then release it.
- Detect and follow the line, and stop as close as possible to the large object, without touching it.

Building Tips
Open-Ended Solutions
This project is designed so that every team can have a unique solution. Use these questions to help the teams brainstorm ideas for solving the project brief:
- How could the robot navigate to the centre of the drop-off zone?
- How could the robot stop following the line as close as possible to the large object?
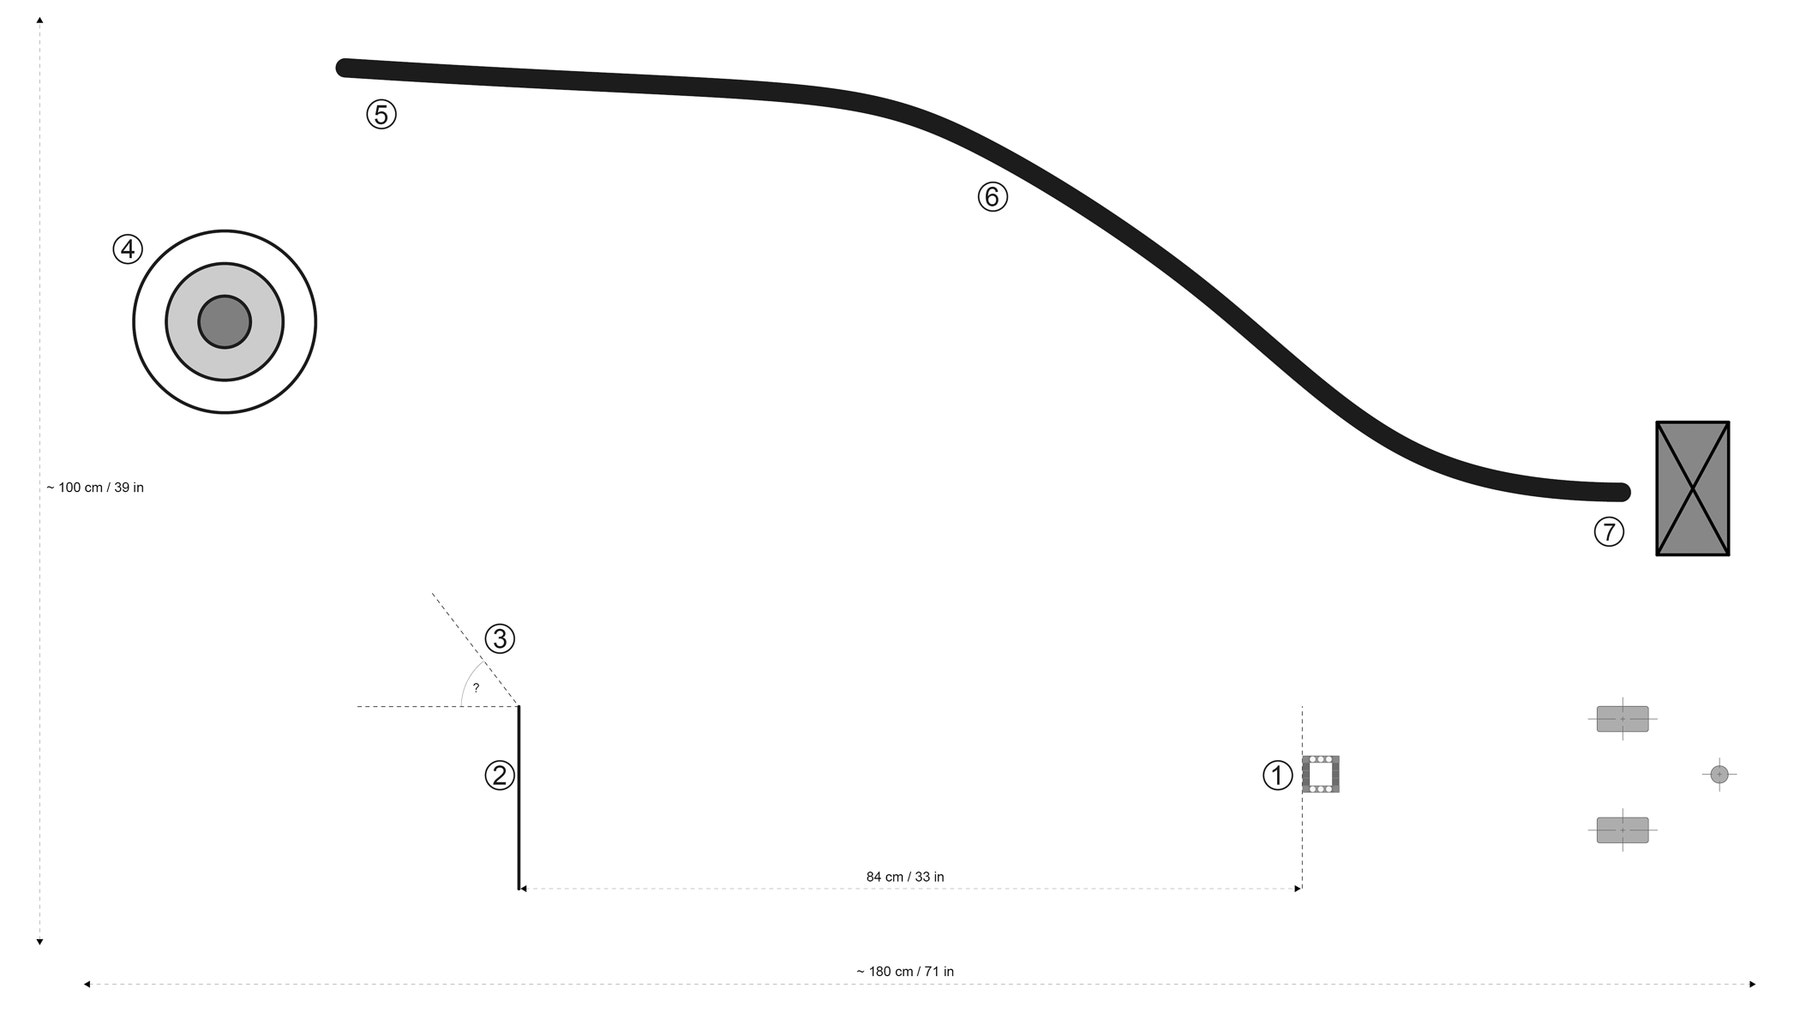
Setting Up the Factory Path
To create the path illustrated below, the pupils will need black electrician’s tape, felt tip pens, a tape measure, the Cuboid and a large object to place at the end of the black line. The given measurements are only meant as suggestions and can be loosely followed. However, the example solution and solution program are based on these measurements.
Example Solution
The example solution combines the following extensions:
Using the Gyro Sensor
The Gyro Sensor must be completely motionless while it’s being plugged into the EV3 Brick and during the start-up of the EV3 Brick. If the Gyro Sensor’s angle readings change while the Driving Base is standing still, unplug the sensor and plug it back in.
Coding Tips
Solution Program

Differentiation
Simplify this lesson by:
- Helping your pupils to figure out how to stop following the line when the large object is detected
- Suggesting that the pupils revisit the previous lessons in this unit
- Allowing the pupils to drive towards the large object without following the line
- Encouraging peer-to-peer learning and coaching
Take this lesson to the next level by:
- Challenging the pupils to make their robots drive forwards precisely 84 cm/33 in after picking up the Cuboid and then use the Gyro Sensor to point the robot towards the target circle
- Using tape of a different colour than what was used in the Colours and Lines lesson
Assessment Opportunities
Teacher Observation Checklist
Establish a scale that suits your needs, for example:
- Partially accomplished
- Fully accomplished
- Overachieved
Use the following success criteria to evaluate your pupils’ progress:
- The pupils have designed a robot that meets the requirements of the project brief.
- The pupils came up with creative solutions and considered multiple solutions.
- The pupils have worked together to complete the challenge as a team.
Self-Assessment
Have each pupil choose the level that they feel best represents their performance.
- Bronze: I did the best I could under difficult circumstances.
- Silver: I had a few accidents along the way, but I’ve still completed one of the tasks.
- Gold: I’ve completed both tasks with excellent results.
- Platinum: I’ve not only completed both tasks, but I’ve also added features that were original and effective.

Language Arts Extension
To incorporate the development of language arts skills, have your pupils:
- Create a presentation or a video that highlights their robot’s features and performance
- Create a presentation explaining the most important features of their program
Note: This will require additional time.
Career Links
The pupils who enjoyed this lesson might be interested in exploring these career pathways:
- Information Technology (Computer Programming)
- Manufacturing and Engineering (Pre-Engineering)
- Science, Technology, Engineering & Mathematics (Science and Maths)
Teacher Support
The pupils will:
- Demonstrate their skills in solving a challenge
LEGO® MINDSTORMS® Education EV3 Core Set
EV3 Classroom App
Electrician’s tape
Felt tip pens
A tape measure
A large object
Protractor (optional)
Computing at School Progression Pathways
Algorithms:
- Designs solutions (algorithms) that use repetition and two-way selection i.e. if, then and else.
- Uses logical reasoning to predict outputs, showing an awareness of inputs.
- Designs solutions by decomposing a problem and creates a sub-solution for each of these parts.
- Recognises that different solutions exist for the same problem.
- Recognises that different algorithms exist for the same problem.
Programming & Development:
- Creates programs that implement algorithms to achieve given goals.
- Uses post-tested loop e.g. ‘until’, and a sequence of selection statements in programs, including an if, then and else statement.
- Understands the difference between, and appropriately uses if and if, then and else statements. (AL)
- Uses a variable and relational operators within a loop to govern termination.
- Designs, writes and debugs modular programs using procedures.
- Knows that a procedure can be used to hide the detail with sub-solution.
- Understands that programming bridges the gap between algorithmic solutions and computers.
- Uses a range of operators and expressions e.g. Boolean, and applies them in the context of program control.
Hardware & Processing:
- Knows that computers collect data from various input devices, including sensors and application software.
Information Technology:
- Makes appropriate improvements to solutions based on feedback received, and can comment on the success of the solution.
- Uses criteria to evaluate the quality of solutions, can identify improvements making some refinements to the solution, and future solutions.
- Designs criteria to critically evaluate the quality of solutions, uses the criteria to identify improvements and can make appropriate refinements to the solution.


