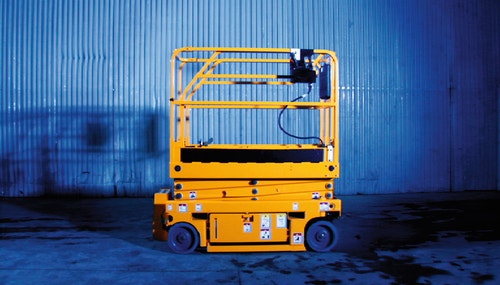
Scissor Lift
Investigate how the function of a scissor lift is influenced by weight and height.
Connect
(5-10 Minutes)
Scissor lifts are designed for easy and safe access to elevated positions and are often used where ladders are not an option. A scissor lift’s work platform provides space for tools and movement, and can lift a heavy load.
Build the Scissor Lift and investigate how its function is influenced by weight and height. Let’s find out!

Construct
(20-25 Minutes)
Build the Scissor Lift.
(All of book 1A and book 1B to page 11, step 15).
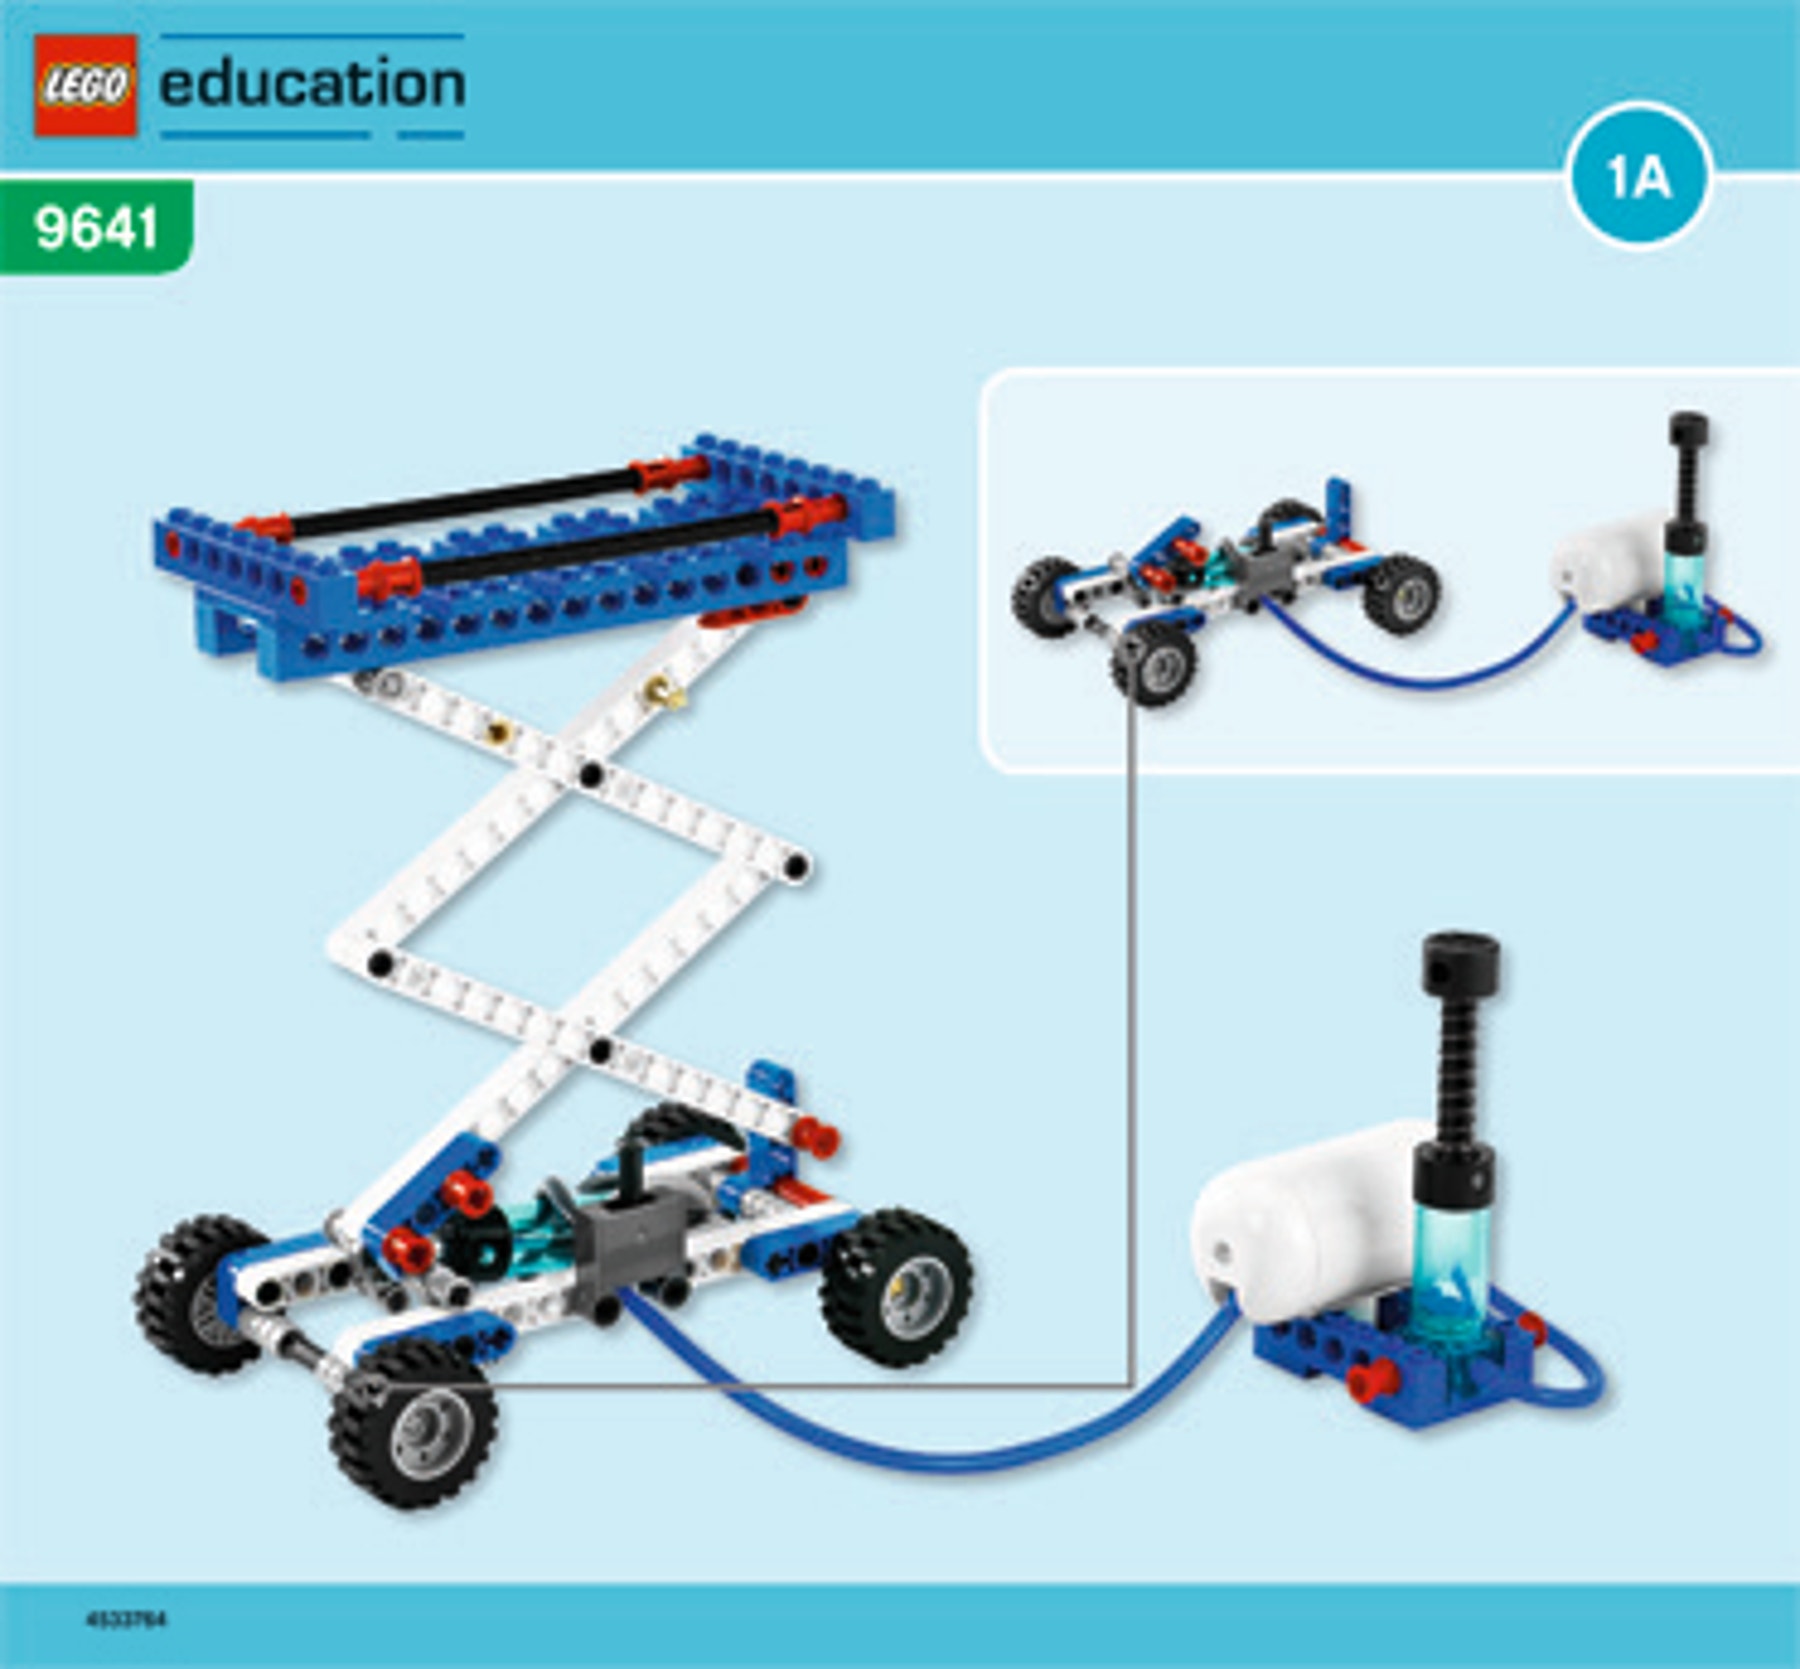
Pump air into the system and make sure the Scissor Lift raises smoothly.
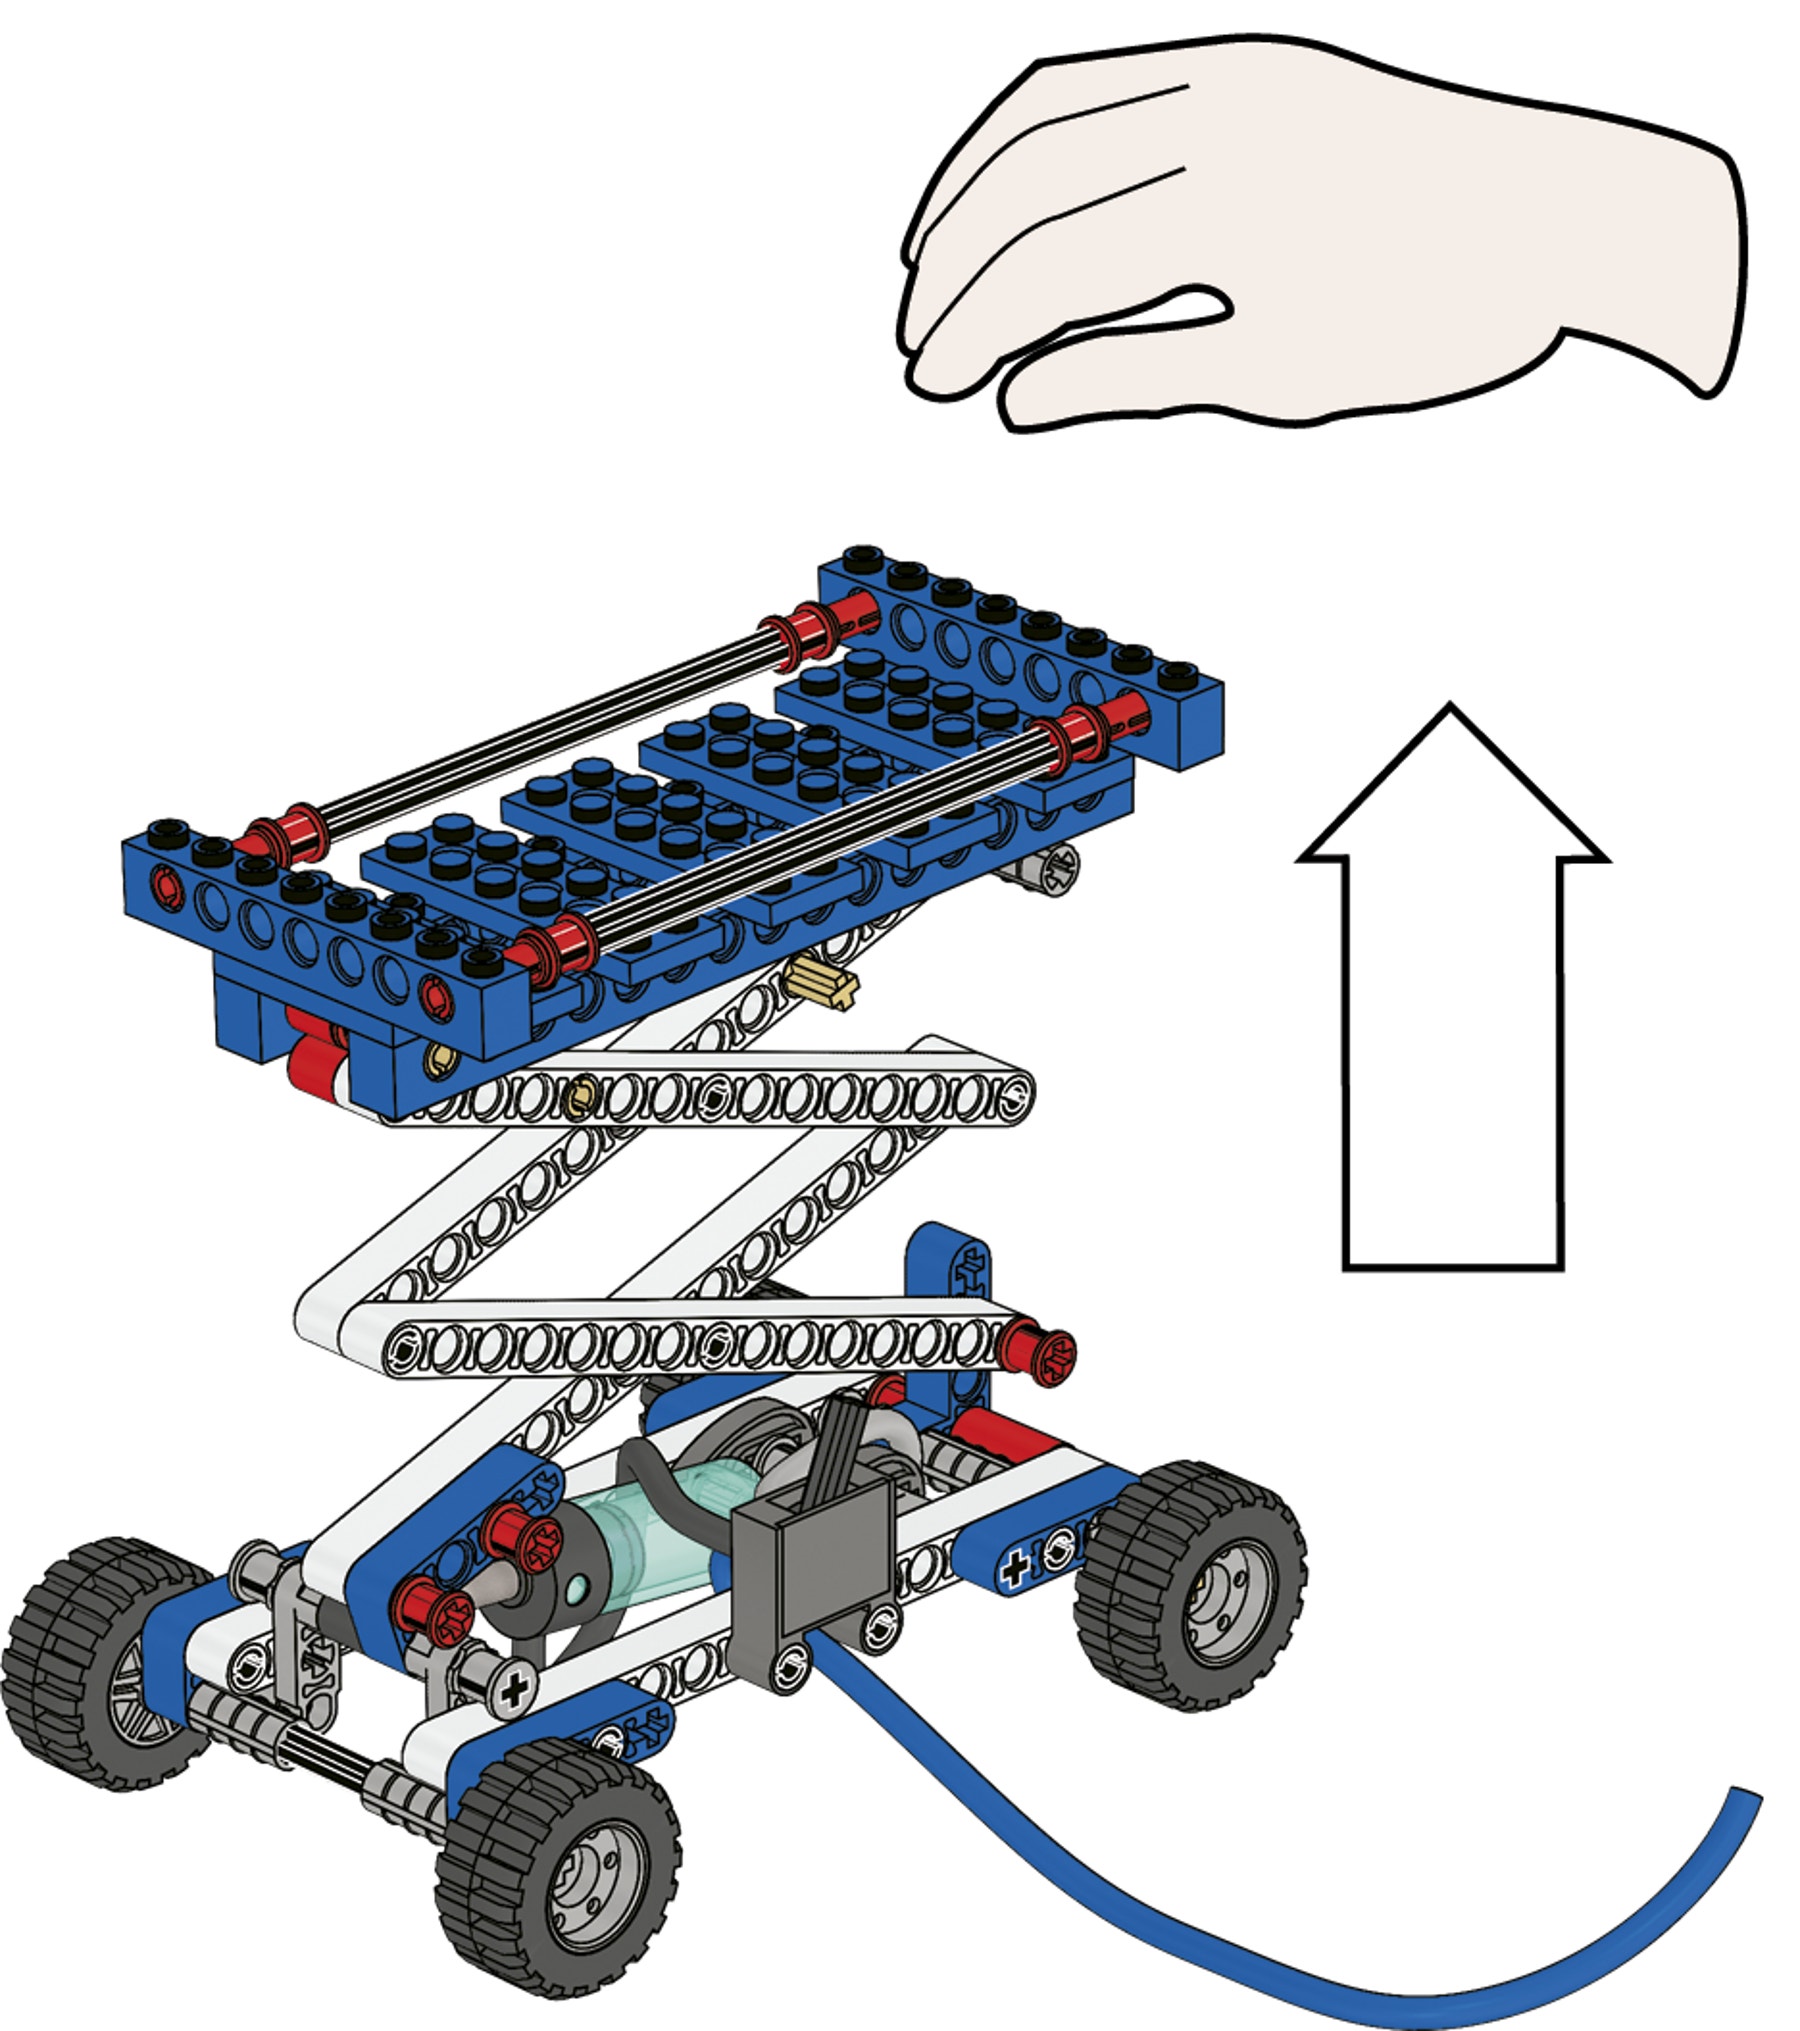
Press down on the platform of the raised Scissor Lift.
When you let go, the platform should bounce back up again. If not, check for air leaks.
Then lower the Scissor Lift and empty the air tank.
Hint
The easiest way to empty the air tank is to disconnect the tube going from the air tank to the valve.
Contemplate
(20-25 minutes)
Going up?
Find out what influence weight and height have on the number of pumps needed to raise the Scissor Lift to its maximum height.
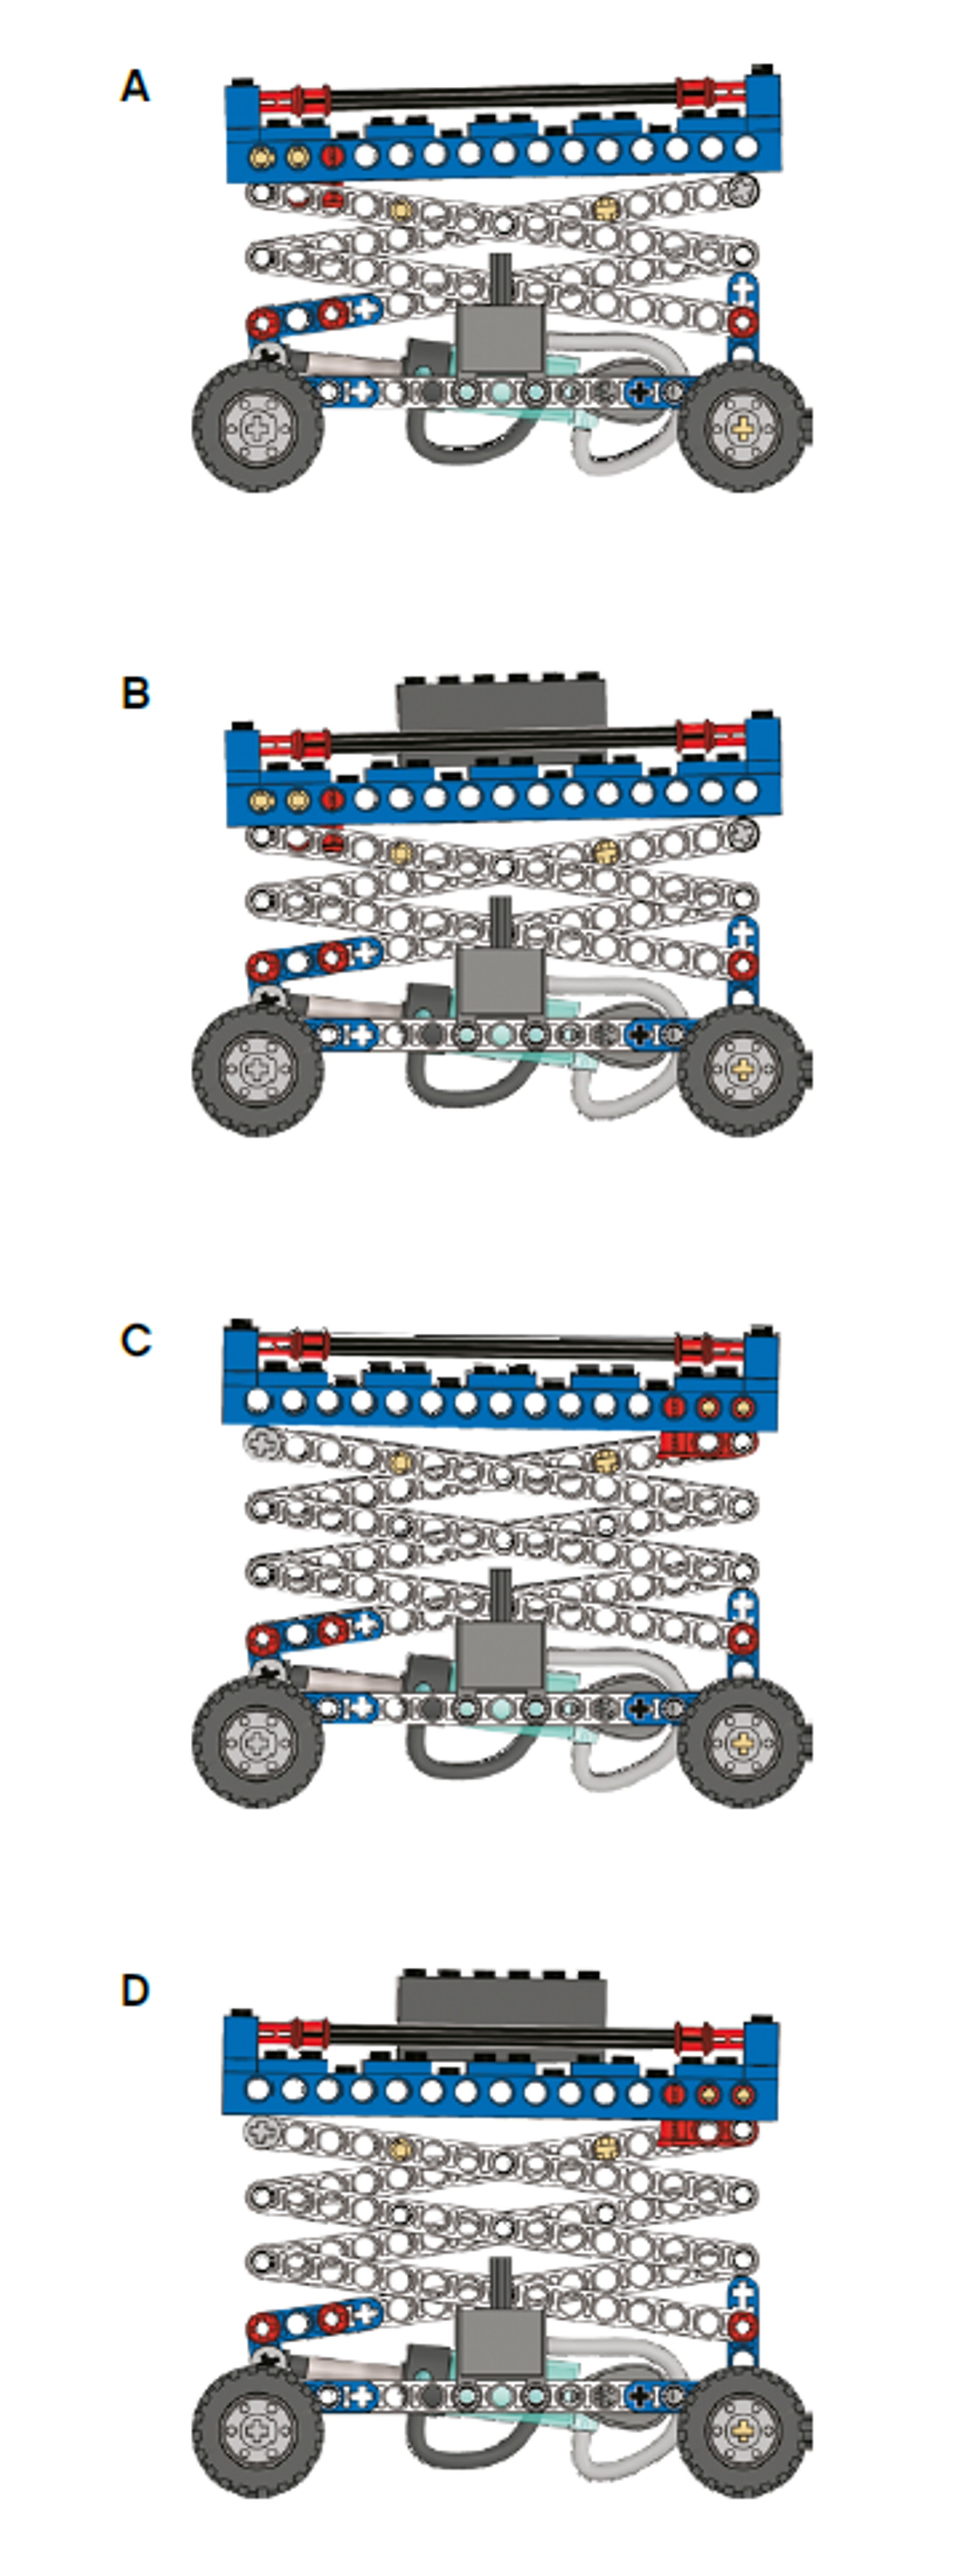
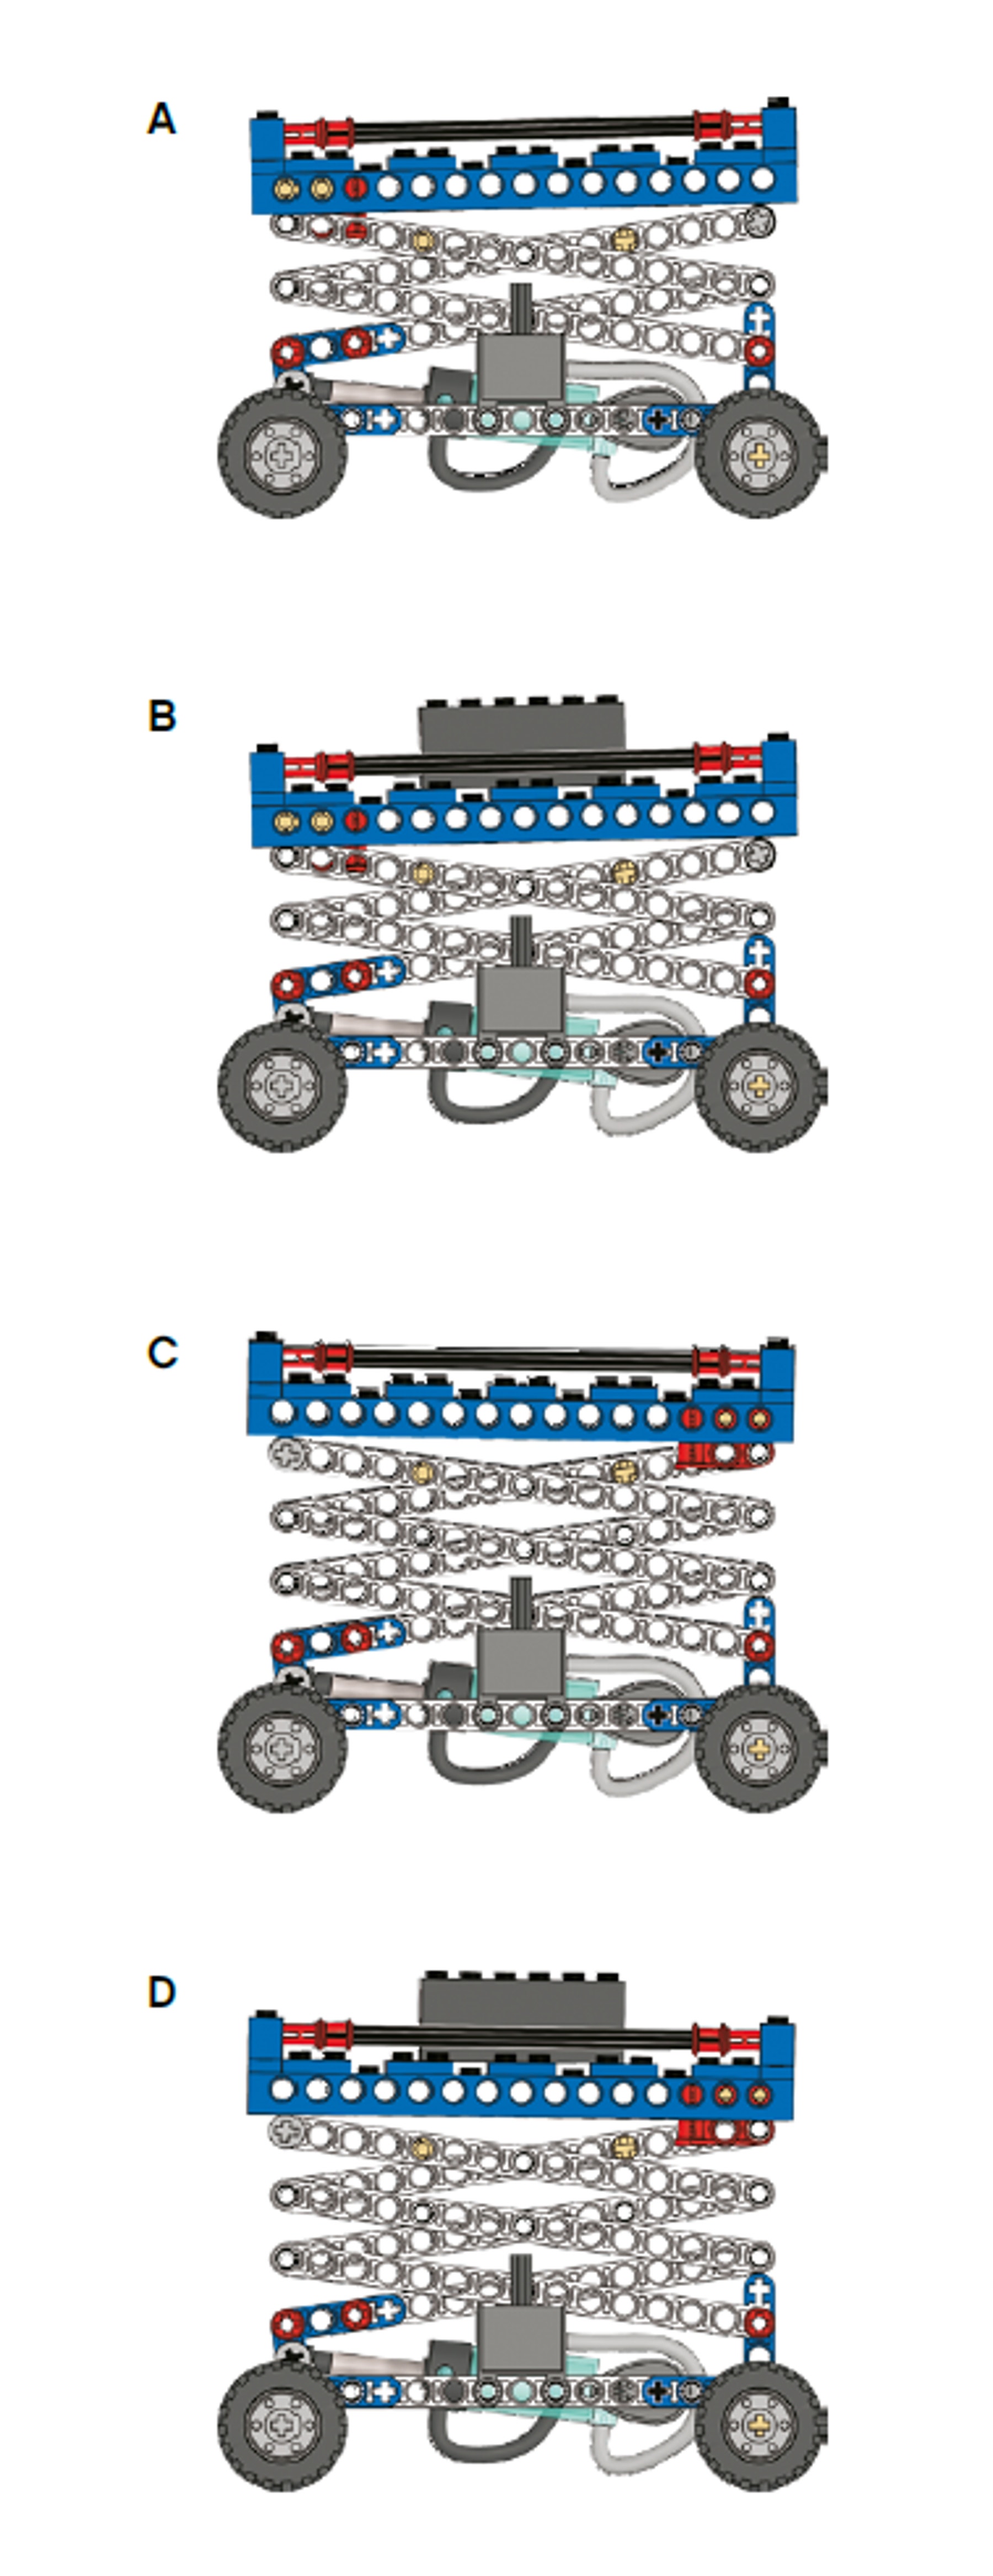
First, predict how many pumps are needed to raise Scissor Lift A to its maximum height. Record your predictions on the worksheet.
Then, test how many pumps are needed. Record your findings on the worksheet.
Next, follow the same procedure for Scissor Lifts B, C and D. Test several times to make sure your results are consistent.
Scissor Lift A (page 11, step 15) needs about 12 pumps
Scissor Lift B (page 12, step 16) needs about 20 pumps
Scissor Lift C (page 17, step 21) needs about 17 pumps
Scissor Lift D (page 18, step 22) needs about 28 pumps
Have the students reflect on their investigations by asking questions such as:
• What did you predict would happen and why?
• How does the Scissor Lift work? It is a series of first class levers each squeezing the next one. The pivot points are the pegs in the centre of the beams.
• How did you make sure the tests were fair? Did you empty the air tank?
Continue
(25-30 Minutes)
How much pressure is needed?
You know how many pumps are needed to raise the Scissor Lift to its maximum height. Now add the manometer and find out how much pressure is needed (page 20, step 24).
First, predict how much pressure is needed to raise Scissor Lift A to its maximum height. Record your prediction on the worksheet.
Then, test how much pressure is needed. Record your findings on the worksheet.
Next, follow the same procedure for Scissor Lifts B, C and D. Test several times to make sure your results are consistent.
Scissor Lift A (page 11, step 15) needs a pressure of about 1.0 bar
Scissor Lift B (page 12, step 16) needs a pressure of about 1,5 bars
Scissor Lift C (page 17, step 21) needs a pressure of about 1,4 bars
Scissor Lift D (page 18, step 22) needs a pressure of about 2,1 bars
Optional: Further investigations
Why does the pressure drop immediately after the Scissor Lift has reached its maximum height?
When the cylinder piston extends, the total area for compressed air has increased. The pressure adaptation of the new total area results in a small pressure drop.
Teacher Support
Students will explore the concepts of:
Area
Behaviour of gases under pressure
Forces
Assembling components
Control of mechanisms
Evaluating
Using mechanisms - levers
9686 Simple & Powered Machines Set (one set per two students is recommended)
9641 Pneumatics Add-on Set
Designing and making
• Applying knowledge of materials and production processes to design
products and produce practical solutions that are relevant and fit for
purpose.
Creativity
• Making links between principles of good design, existing solutions and
technological knowledge to develop innovative products and processes.
• Reinterpreting and applying learning in new design contexts and
communicating ideas in new or unexpected ways.
• Exploring and experimenting with ideas, materials, technologies and
techniques.
Critical evaluation
• Analysing existing products and solutions to inform designing and making.
• Evaluating the needs of users and the context in which products are used to
inform designing and making.
• Exploring the impact of ideas, design decisions and technological advances
and how these provide opportunities for new design solutions.
Scientific thinking
• Using scientific ideas and models to explain phenomena and
developing them creatively to generate and test theories.
• Critically analysing and evaluating evidence from observations and
experiments
Practical and enquiry skills
• Use a range of scientific methods and techniques to develop and test ideas
and explanations
• Plan and carry out practical and investigative activities, both individually and
in groups.
Critical understanding of evidence
• Obtain, record and analyse data from a wide range of primary and secondary
sources, including ICT sources, and use their findings to provide evidence for
scientific explanations
• Evaluate scientific evidence and working methods.
Pupil Material
Share with:
 Google Classroom


