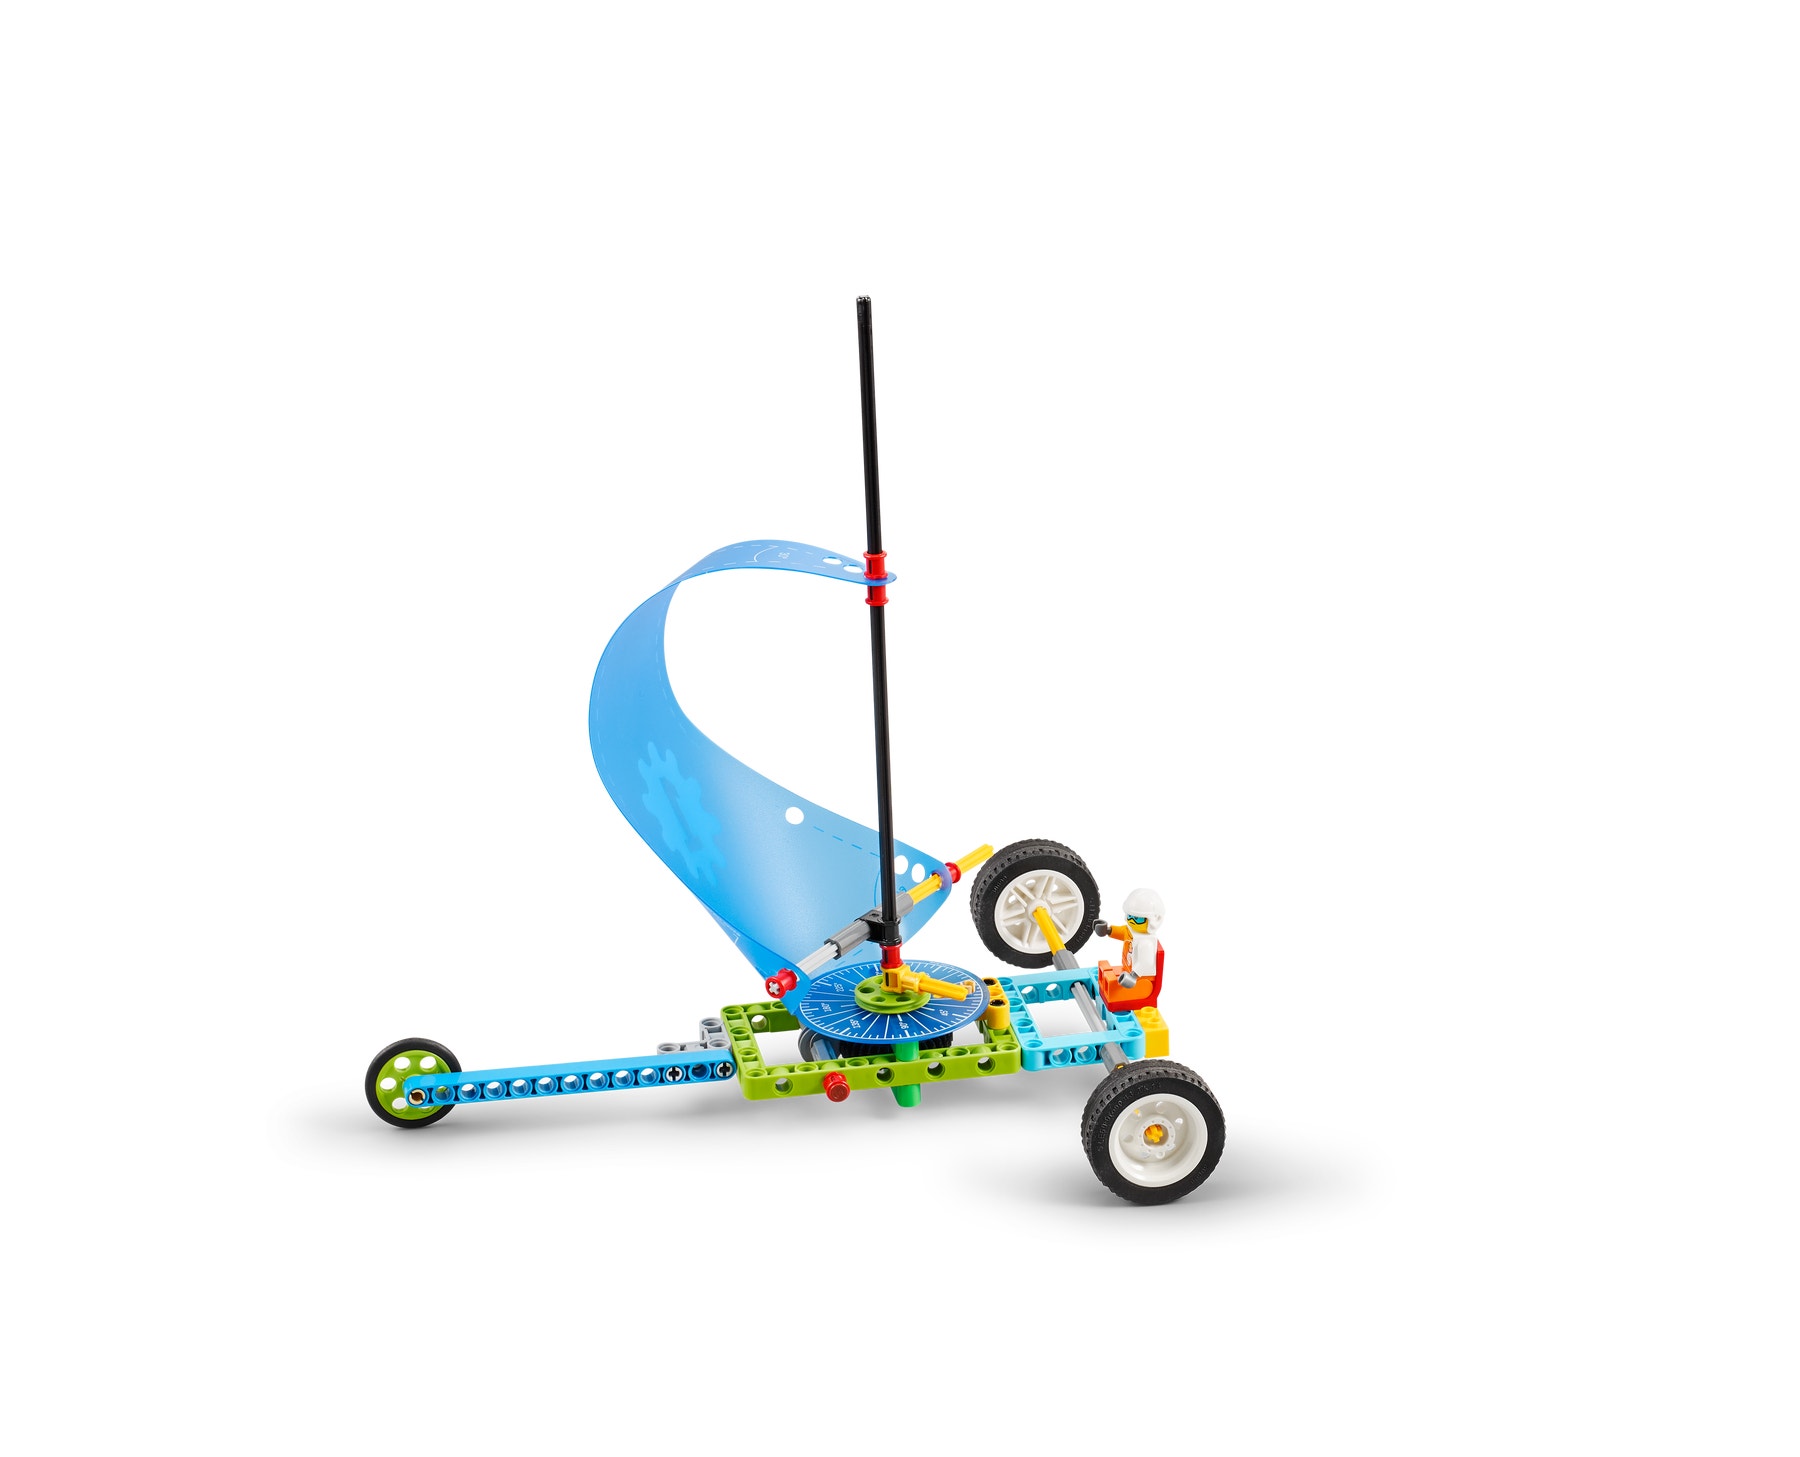
Land Yacht
Can a land yacht sail into the wind? Investigate how invisible forces can change an object's motion and how this force acts from a distance.

Prepare
- Review the online student material. Use a projector to share this material with your students during the lesson.
- Make sure that you've covered Newton’s three laws of motion in an earlier lesson.
- Consider the abilities and backgrounds of all of your students. Differentiate the lesson to make it accessible to everyone. See the Differentiation section below for suggestions.
- Set up the fans on the floor, allowing at least 3 yards in front of each, so the land yachts have room to move. Use a strip of tape to mark a starting position in front of each fan (perpendicular to the fan).
Engage
(Whole Class, 5 Minutes)
- Watch the student video here, or access it via the online student material.

- Facilitate a quick discussion about which force makes a land yacht move.
- Ask questions, like:
- Which forces did you see in action when watching the sailboat and kite in the video? (pull/push)
- Which force made the sailboat move? (It was the push force of the wind.)
- In what situations does a sailboat not work? (If the wind is blowing straight toward the sailboat, the boat can't sail directly forward into the wind.)
- Tell students that they're going to build a land yacht, and investigate how wind force can change its motion.
Explore
(Small Groups, 30 Minutes)
- Ask the students to work in pairs to build the Land Yacht model. Tell them to take turns, one partner searching for the bricks while the other builds, switching roles after each step has been done.
- You can find support for building in the Tips section below.
- Direct them to the three experiments in the student material, and distribute the Student Worksheets (Teacher Support – Additional Resources).
Experiment 1: Downwind
- Ask the students to set their land yachts on the starting line, facing away from the fans.
- Tell them to turn on the fans and to let their land yachts blow downwind (straight away from the fans) and to make observations about their movement. To optimize the land yacht's movement, the sail angle can be adjusted by turning the small gear. The red bushings can also be moved to change the shape of the sail.
- Challenge your students to find the best sail angle and shape for making the land yacht travel the farthest distance.
- Have them record the best angle and shape on their Student Worksheets.
Experiment 2: Crosswind
- Ask the students to set their land yachts on the starting line at a right angle, 90 degrees perpendicular to the fan.
- Have them turn on the fans to see if their land yachts move to the side of the fan. (They'll have to adjust the angle of the sail again to optimize the land yacht's movement.)
- Challenge your students to find the best sail angle, and record it on their worksheets.
Experiment 3: Into the Wind
- Have the students turn their land yachts slightly off the starting line and toward the fan to see which sail angle can make the land yacht drive “upwind” toward the direction the wind is coming from. They can use the angle measurement tool from their sets to measure the upwind angle of the land yacht from the line. With the right adjustments, the students will be able to make their land yachts move upwind, but not directly into the wind.
Explain
(Whole Class, 5 Minutes)
- Gather your students together to review and discuss their experiments.
- Ask questions, like:
- Which angle was best for each experiment?
- What were the limits? (Too much wind at the wrong angle can make the land yacht tip over. That’s why sailboats “reef” their sails to reduce the surface area of the sail, so the boat doesn’t blow over and capsize).
- Why can’t the land yacht go more than 45 degrees upwind (toward the fan)? (The sum of the force vectors acting on the vehicle pushes it downwind.)
Elaborate
(Whole Class, 5 Minutes)
- If time allows, explain the forces at work (force vectors) in detail.
- Allow time for the students to disassemble their models, sort the bricks back into the trays, and clean up their workstations.
Evaluate
(Ongoing Throughout the Lesson)
- Give feedback on each student's performance.
- Facilitate self-assessment.
- Use the assessment rubrics provided to simplify the process.
Observation Checklist
- Measure your students’ proficiency in describing how different forces can change an object's motion.
- Create a scale that matches your needs. For example:
- Needs additional support
- Can work independently
- Can teach others
Self-Assessment
- Have each student choose the brick that they feel best represents their performance:
- Green: With some help, I can describe how an invisible force can change an object's motion.
- Blue: I know I can describe how an invisible force can change an object's motion.
- Purple: I can describe and explain how an invisible force can change an object's motion.
Peer-Feedback
- Encourage your students to assess their peers by:
- Using the brick scale above to score each other's performance
- Presenting their ideas and giving constructive feedback

Tips
Model Tips
- Have the groups start testing as soon as they finish building. They should take turns as they make sail adjustments to ensure that everyone has a chance to try out the models.
- Choose ONE fan speed setting for all of the tests. Any speed will do.
- If your fan is too big or too powerful, try moving it farther back from the starting line. You could also use a piece of furniture to block some of the fan's airflow.
- If your fan is too small, move it closer to the models or try moving the fan by hand, following the models.
Differentiation
Simplify this lesson by:
- Having your students set the sail at 90 degrees for each of the tests
Increase the difficulty by:
- Encouraging the students to adjust the shape of the triangular sail
- Challenging your students to figure out how to make the land yacht move upwind
Extensions
(Note: This will require additional time.)
To incorporate math skills development, have the students let their land yachts go at a 60-degree angle from the starting line, and measure how far they travel by counting how many revolutions the rear wheels made before they stopped. They can use the angle and distance traveled to calculate the area of the triangle that was created.
Rear wheel diameter = 43.2 mm
Circumference of the wheel = (π x D = C)
CCSS.MATH.CONTENT.6.G.A.1
Teacher Support
Students will:
- Understand how wind force acting from a distance can change an object’s motion
- Explore the relationship between energy and forces
- LEGO® Education BricQ Motion Prime Set (one for every two students)
- Masking tape
- Medium-sized tabletop electric fans (ideally, 1 for every 10 students)
- NGSS MS-PS2-2
- ISTE 7c
- CCSS.ELA-LITERACY.SL.6.4
Lesson extension
- CCSS.MATH.CONTENT.6.G.A.1
Student Material
Share with:
 Google Classroom


