BricQ Motion Essential
Hockey Practice
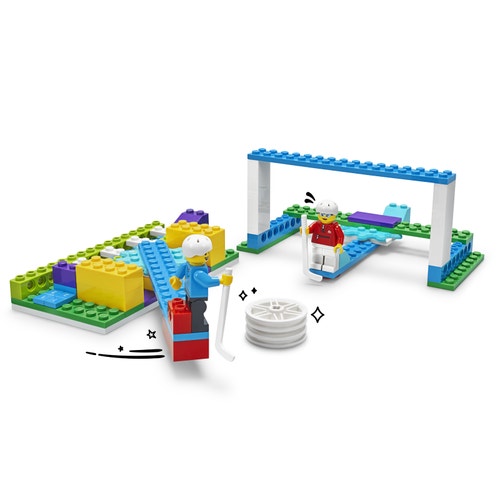
Build a hockey player and goalie! Explore how different push and pull forces help make and block penalty shots.
30-45 min.
Intermed.
K-2
Hybrid
Prepare
- Review the online student material. Use a projector to share this material with your students during the lesson.
- Make sure that you've covered the relevant concepts (i.e., push and pull) in an earlier lesson.
- Consider the abilities and backgrounds of all of your students. Differentiate the lesson to make it accessible to everyone. See the Differentiation section below for suggestions.
Engage
(Whole Class, 5 Minutes)
- Watch the student video here, or access it via the online student material.
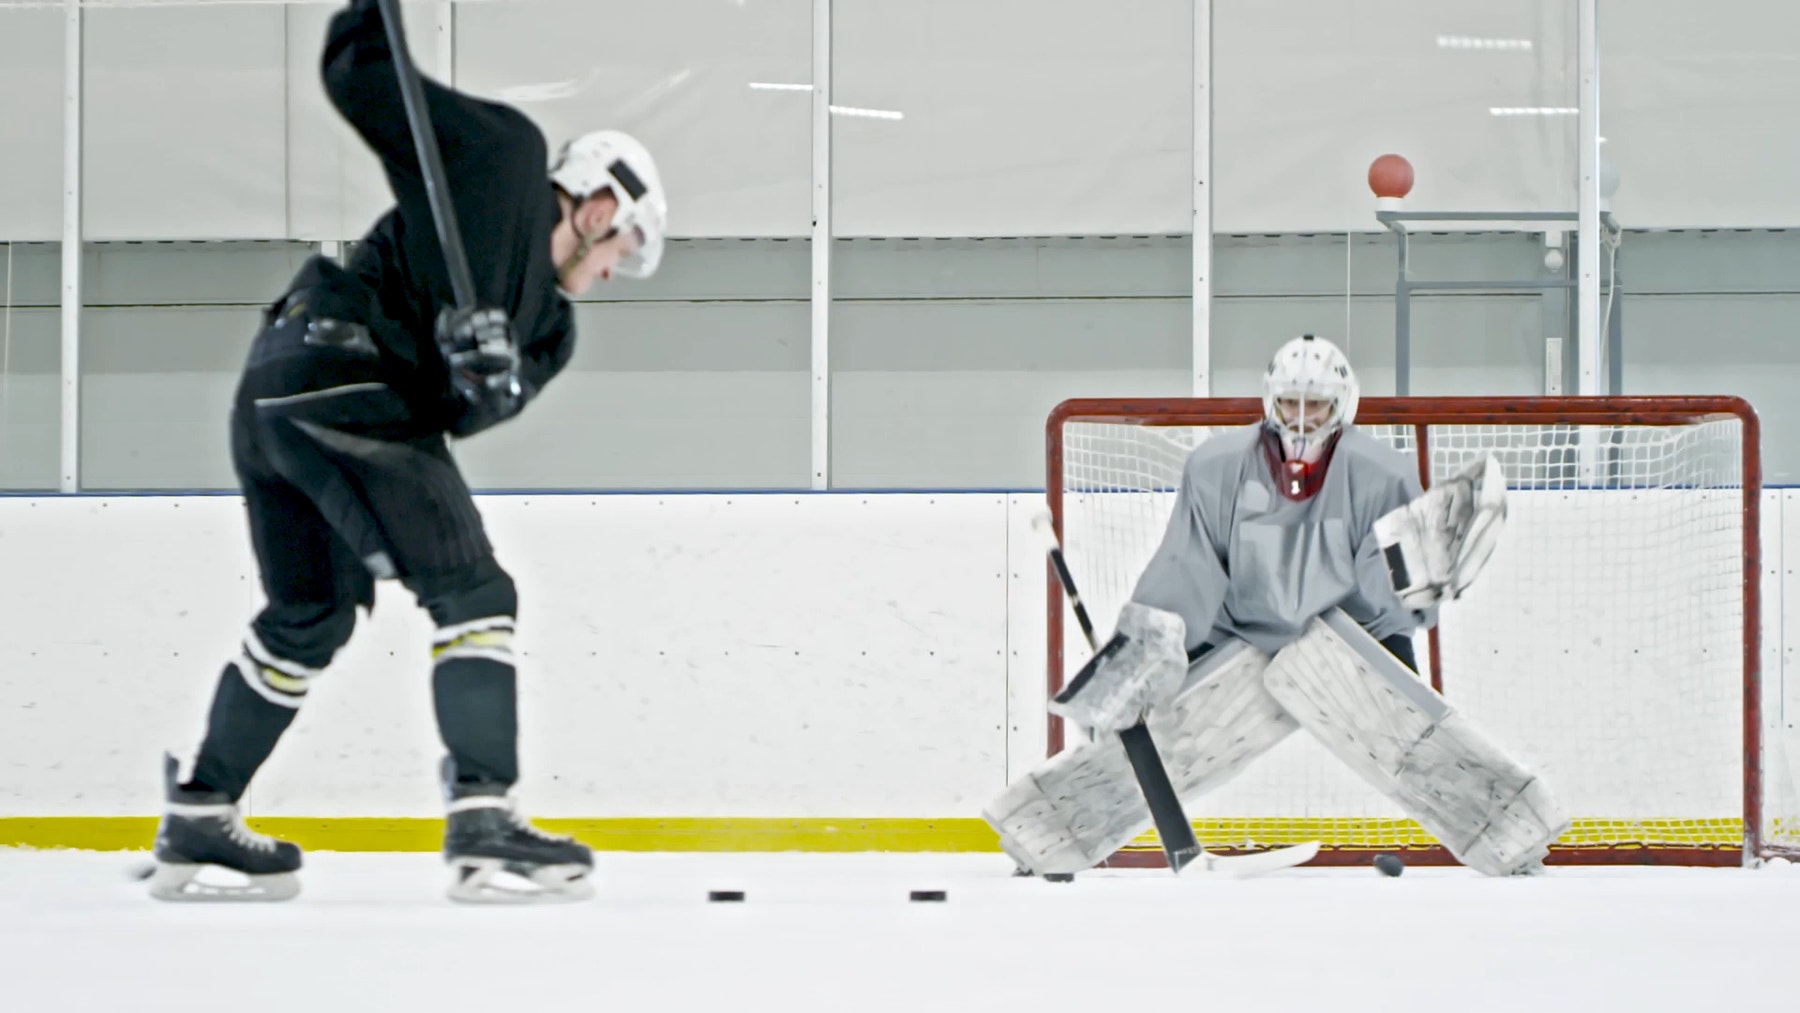
- Facilitate a discussion about the push and pull forces that are at play in a hockey game.
- Introduce the terms puck, player, goalie, making and blocking shots, and force.
- Introduce the concepts of slow, medium, and fast push/pull forces.
- Ask questions, like:
- What is hockey?
- How does the puck move? (i.e., How do the players move the puck?)
- How do the players make the puck move at different speeds (i.e., fast and slow)?
- Tell the students that they'll be building a hockey player and a goal with a goalie.
- Distribute a set to each group.
Explore
(Small Groups, 25 Minutes)
- Have students work in pairs to build the Hockey Practice model. Tell them to take turns, one partner searching for the bricks while the other builds, switching roles after each step has been done.
- You can find support for building in the Tips section below.
- When the students have finished building, lead them through testing:
- Have the teams place their models about 30 centimeters (12 inches) apart on a smooth surface (i.e., uncarpeted floor or tabletop).
- Tell students to take turns being the player and goalie after every 3 shots.
- Practice making and blocking shots with a slow, medium, and fast pull force.
- Each goal is 1 point for the player, have the students keep score on their Student Worksheets (Teacher Support – Additional Resources).
- The students should test each type of force 3 times for a total of 9 practice shots.
Explain
(Whole Class, 5 Minutes)
- Gather your students together to share what they've built.
- Ask questions, like:
- What happens when you push the handle? Why?
- How does the hockey player move when you pull the handle? Why?
- What did you notice about how the puck moved with the different types of forces?
- Did you notice anything about the number of goals scored or missed when you used the different types of forces? (Explain that a bigger push makes things speed up or slow down more quickly. A soft or medium push may be all that's needed to make or block a goal.)
Elaborate
(Whole Class, 10 Minutes)
- Ask your students to think of ways to improve the game, and some modifications they could make to their models that could improve their performance. Facilitate a group sharing session.
- Allow 5 minutes for the students to disassemble their models, sort the bricks back into the trays, and clean up their workstations.
Evaluate
(Ongoing Throughout the Lesson)
- As they build, encourage the students to explore the model's movement and to explain which parts are pushing and pulling.
- Ask guiding questions to encourage your students to “think aloud” and explain their thought processes and reasoning in the problem-solving decisions they've made when building their models.
Observation Checklist
- Measure your students’ proficiency in describing how different forces affect how a bigger push or pull makes things speed up or slow down.
- Create a scale that matches your needs, for example:
- Needs additional support
- Can work independently
- Can teach others
Self-Assessment
- Have each student choose the brick that they feel best represents their performance:
- Green: I think I can describe what "push" means.
- Blue: I know I can describe what "push" means.
- Purple: I can describe what "push" means, and I can help a friend understand, too.
Peer-Feedback
- In their small groups, have the students discuss their experiences working as a group.
- Encourage them to use statements like:
- I liked it when you….
- I'd like to hear more about when you….
Tips
Model Tips
- This is a challenging model and will take some teams up to 20 minutes to build. At the end of 20 minutes, they should've at least finished the player. It's best to stop students at the 20-minute mark and ask them to practice moving the puck. If some groups haven't finished building the goalie, they can just place 2 bricks on the table and shoot between them.
- The gear rack on the player model isn't attached. It's designed to slide on the smooth blue number bricks and stay “locked” in place by the green brick and the 2x4 yellow bricks. It's held down by the gear.

Differentiation
Simplify this lesson by:
- Having the students stop building after they've finished the hockey puck pusher; they can use their hands or other markers as a goal
Increase the difficulty by:
- Having the students record 1 point for each slow, medium, or fast pull goal scored
- Challenging your students to find a way to swap the blue gear for the green gear in the player model, then testing different forces by comparing the 2 gears
- Asking each team to design their own hockey rink
Extensions
Math Extension (Note: This will require additional time.)
To incorporate math skills development, have your students play a hockey game and stop when they reach a score of +20 or -20. The rules are:
- Player: Each scored goal is +1, each lost goal is -1
- Goalie: Each blocked goal is +1, each scored goal is -1
- They should keep score on their Student Worksheets; or use bricks to
keep score, giving or taking away 1 brick for each point scored or
lost.
CCSS.MATH.CONTENT.1.OA.A.1
1:1 Hybrid Learning
Download the Personal Learning Kit lesson plan from the hybrid learning resources.
Teacher Support
Students will:
- Explore the effects of different strengths of push and pull forces on the motion of an object
- See how a rack and pinion mechanism works to convert a linear pull into a rotational push
- LEGO® Education BricQ Motion Essential Sets (one for every two students)
- NGSS K-PS2-1
- ISTE 7c
- CCSS.ELA-LITERACY.SL.1.2
Lesson extension
- CCSS.MATH.CONTENT.1.OA.A.1


