Make a Sloth Car
Design and build a car that moves at the speed of a sloth.
This Maker lesson:
- Gives you further Maker inspiration
- Uses the Maker design process
- Includes a Maker brief and a generic Student Worksheet
- Helps you to guide your students through the Maker design process
1. Introduction/Discussion
Allow the students to interpret the Maker brief for themselves, or read it aloud to set the scene.
Make a Sloth Car
Can you think of situations in which it is important to move slowly? What if there was a special car race where the slowest car was the winner? What would you need to build to make it go slow? How could you use gears to slow rotation and speed?
Make a car that moves at the speed of a sloth.
2. Find a Problem
As part of your lesson preparation, find a few inspirational images or illustrations to share with your students as they are reviewing the Maker brief and defining the problem that they will solve.
As the students look at the Maker brief, facilitate a discussion to steer them toward a problem. Once they have decided upon how they want to solve the problem, ensure that they record it on their worksheet.
3. Brainstorm
Students should initially work independently, spending three minutes to generate as many ideas as they can to solve the problem. They can use the bricks from the set during the brainstorming process, or sketch out their ideas.
Students can now take turns sharing their ideas within their groups. Once all of the ideas have been shared, each group should select the best idea(s) to make. Be prepared to help facilitate this process to ensure that the students choose something that is possible to make.
Encourage diversity, not all student groups have to make the same thing.
Encourage the students to share their learning process. Provide them with the opportunity to share their thinking, ideas, and reflections using the documentation tool(s) they have available.
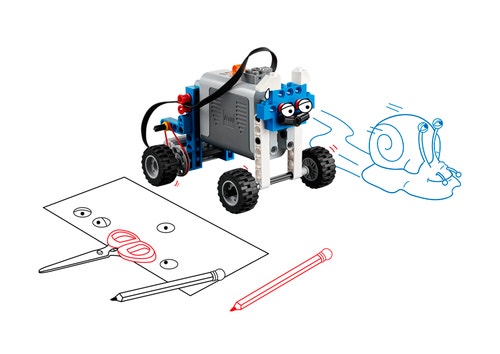
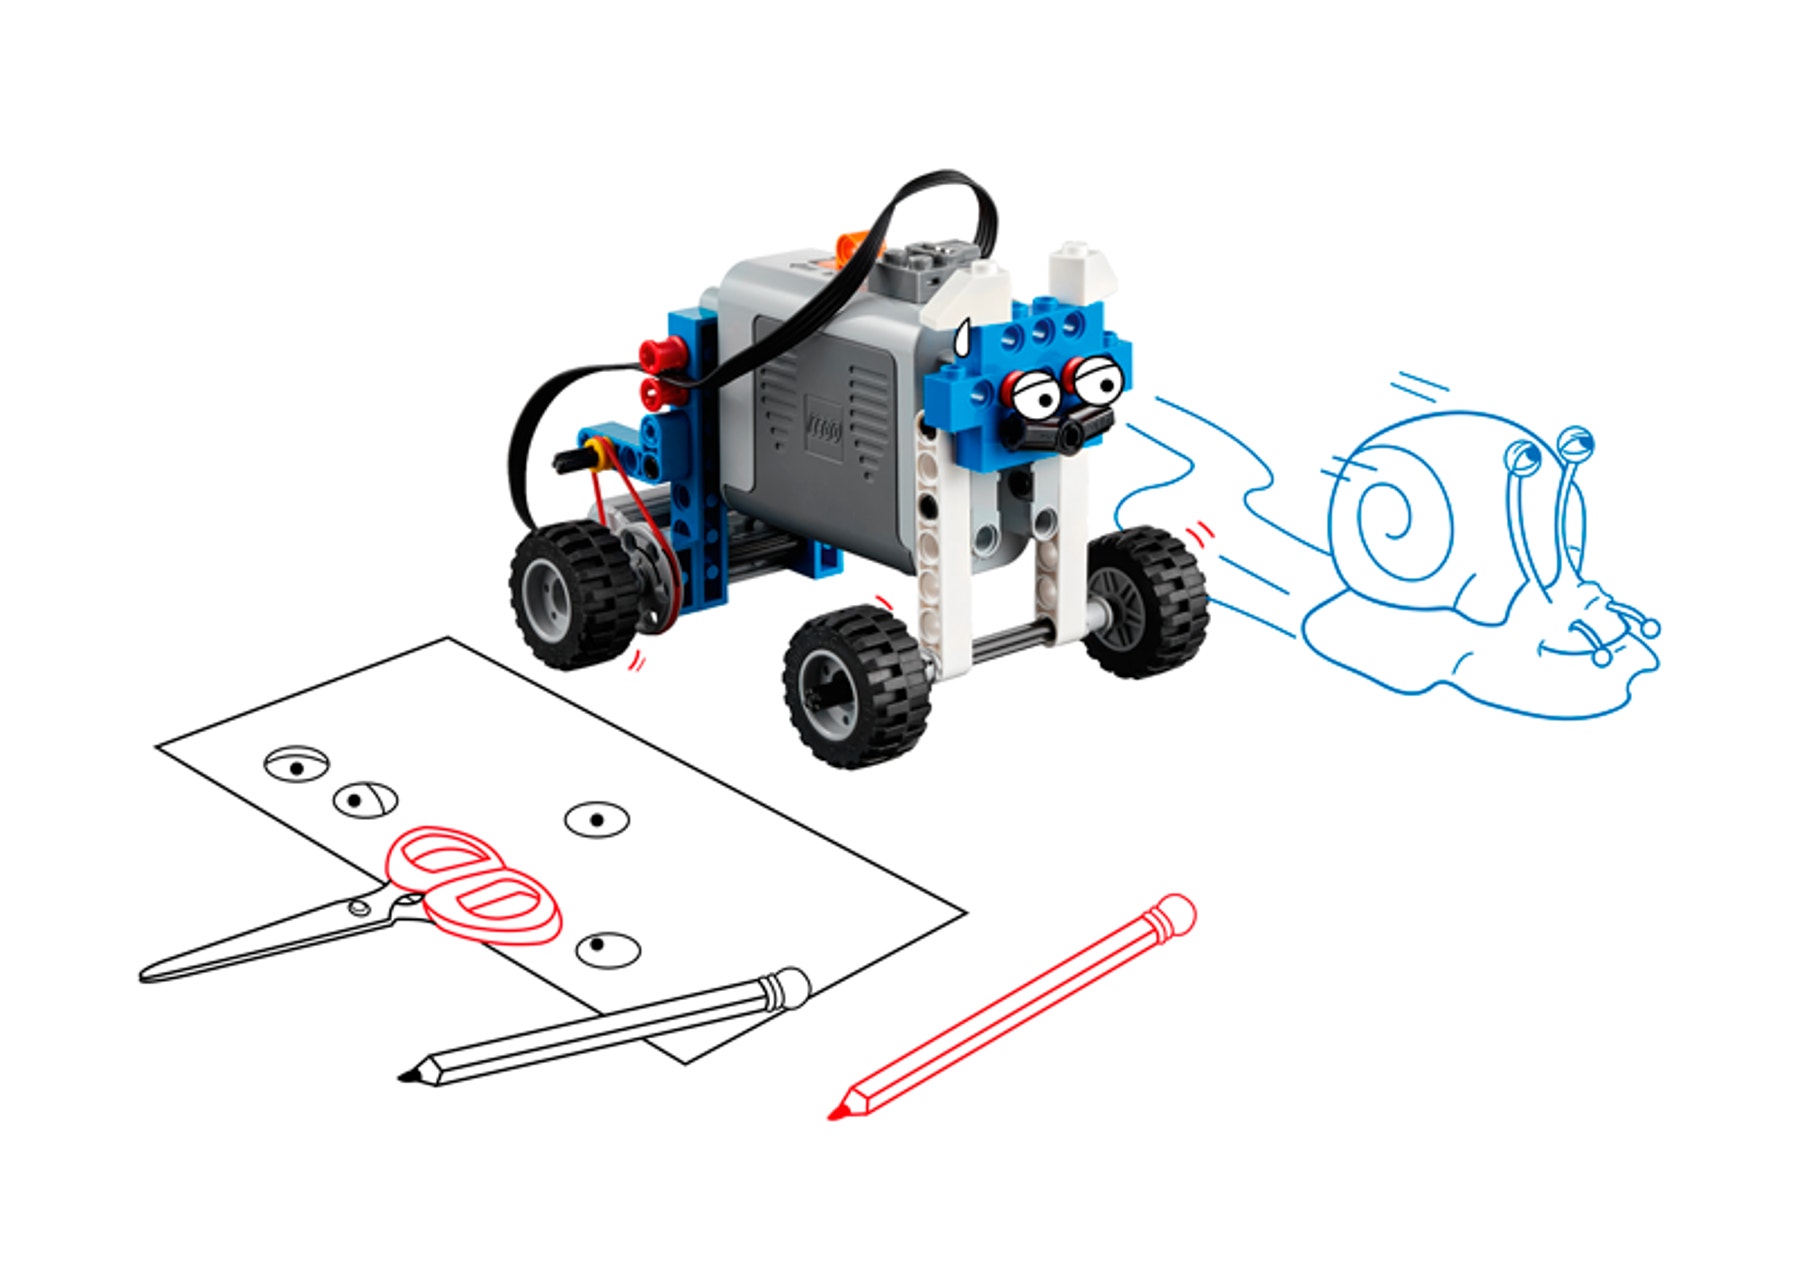
Possible Solution
Note: To encourage maximum creativity, you may choose not to share this image with students.
4. Define the Design Criteria
Students should record up to three design criteria on their worksheets. They will refer to this again as they review and revise their solutions.
5. Go MAKE
Students make one of the ideas using the LEGO® Simple Machines Set and other materials as needed.
Reinforce that students do not have to come up with the whole solution from the start. For example, they can begin by investigating different parts of a solution or a specific function of an element before focusing on the overall solution.
During the making process, remind students to test and analyze their idea as they go, making improvements where necessary. This iteration is a natural part of the process and it should occur several times as they improve upon their initial idea. If you want students to submit their documentation at the end of the lesson, ensure that they record their design journey during the making stage using sketches and photos of their models.
6. Review and Revise Your Solution
Students test and evaluate their designs against the design criteria they recorded before they started making their solution.
Allow the students to select the tool(s) they find appropriate for capturing and sharing their reflections. Encourage them to use text, videos, images, sketchnotes, or another creative medium.
7. Present Your Model
Allow time for each student or student group to present what they have made to the class. A good way to do this is to set out a table large enough to display all of the models. If time is short, two groups can present to each other.
8. Assessment
Students use the Maker self-assessment rubric to evaluate their design work. Each rubric includes four levels of achievement. The intention is to help students reflect on what they have done well and what they could have done better. Each rubric can be linked to engineering related learning goals from the NGSS.
9. Tidy Up
Ensure that you leave enough time at the end of the lesson to break the models down and sort them back into the LEGO boxes. You will need approximately 10 minutes to do this.
Teacher Support
After completing this lesson, students will have:
Defined a clear design need
Developed their ability to iterate and improve design solutions
Developed their problem-solving and communication skills
Have used and understood the design process
Simple and Powered Machines Set
Optional
Use craft materials that you already have in your classroom to add another dimension to this lesson. Some materials could be:
Rubber bands
Pipe cleaners
Paper cups
Recycled materials and objects from nature
Egg cartons
Fabric or felt
Foam, pom-poms, or beads
NGSS
Science and Engineering Practices
MS-ETS1.1, MS-ETS1-2, MS-ETS1-3, MS-ETS1-4
Disciplinary Core Ideas
ETS1.A, (MS-ETS1-1)
ETS1.B, (MS-ETS1-2), (MS-ETS1-3), (MS-ETS1-4)
ETS1.C, (MS-ETS1-3), (MS-ETS1-4)
Common Core State Standards
ELA/Literacy
WHST.6-8.8
SL8.5
Mathematics
MP.2, 7.EE.3
Student Material
Share with:
 Google Classroom


