Send Messages
Explore how messages can be transferred from one place to another.

1. Preparation
(15-30 Minutes)
- Read the project and the relevant Teacher Assistant material.
- Define how you would like to introduce this project. You can use the video provided with the project or use your own material.
- Determine the end result of this project. For example, define the parameters of your students’ presentations and the specific elements that they should include in their documents.
2. Explore Phase
(10-45 Minutes)
Communication between people has always been a fundamental part of our existence. Not long ago, before satellites and mobile phones were invented, various ingenious devices were used in order to exchange information.
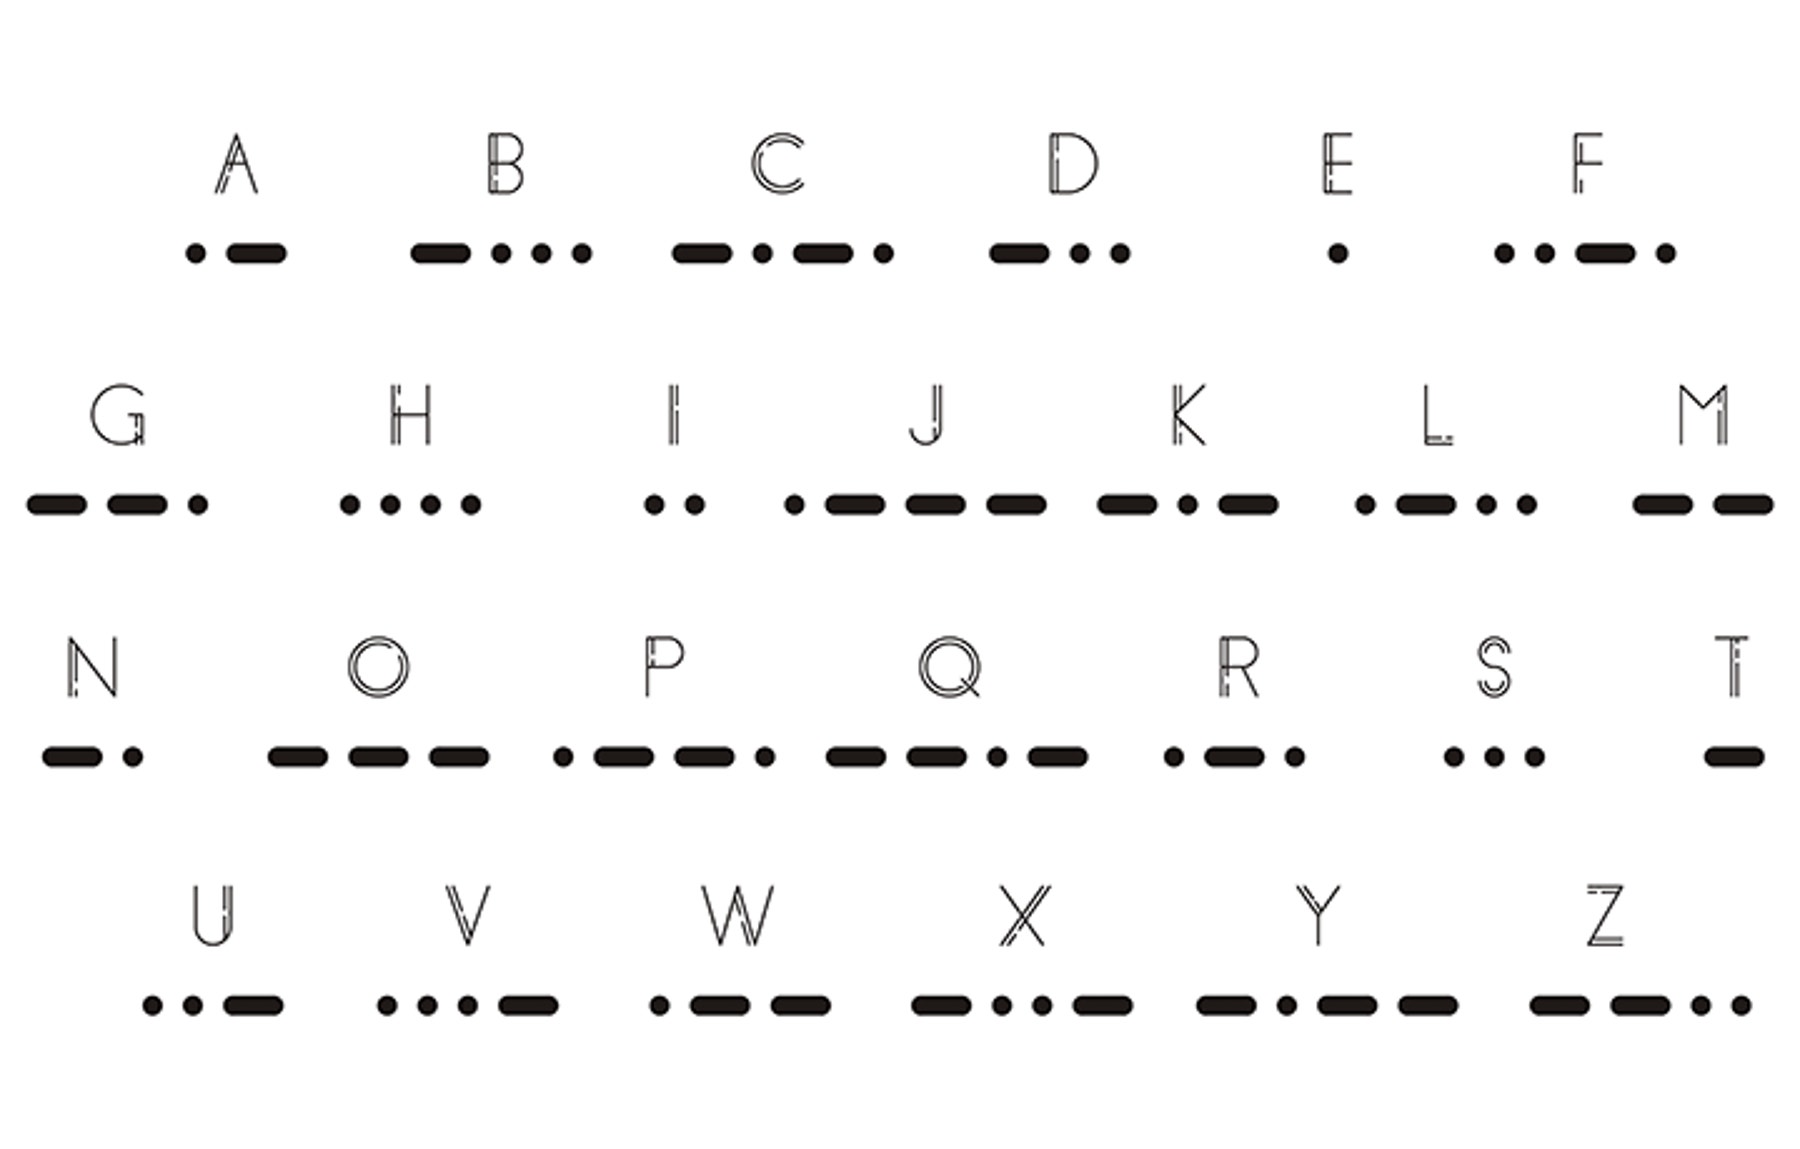
For a long time, the only way to send a message from one place to another was to write it down and have someone deliver the message. In order to send messages more effectively, new ways of transferring messages, such as using electric current and wave signals, but also to develop a way of converting a common message into signals. Morse code is one of the most well-known ways to do this. Morse code transcribes each letter into a series of short and long signals.
Questions for discussion
- What are some ways in which to send messages?
For a long time, we have used wires and electricity to transmit messages from one place to another. Waves are also commonly used to transmit messages over longer distances. Light and electricity are good examples of technologies that are used to send signals. Light and electricity are called ‘binary phenomena’ because they have two states (light and no light). Binary systems that make use of electricity are the foundation of modern communication. - What is one way to convert or change a message into a signal?
Elements such as light, sound and images could be explored. Have a discussion with your students about the importance of both the sender and the receiver having the same code when exchanging a message.
3. Create and Test Phase
(40-60 Minutes)
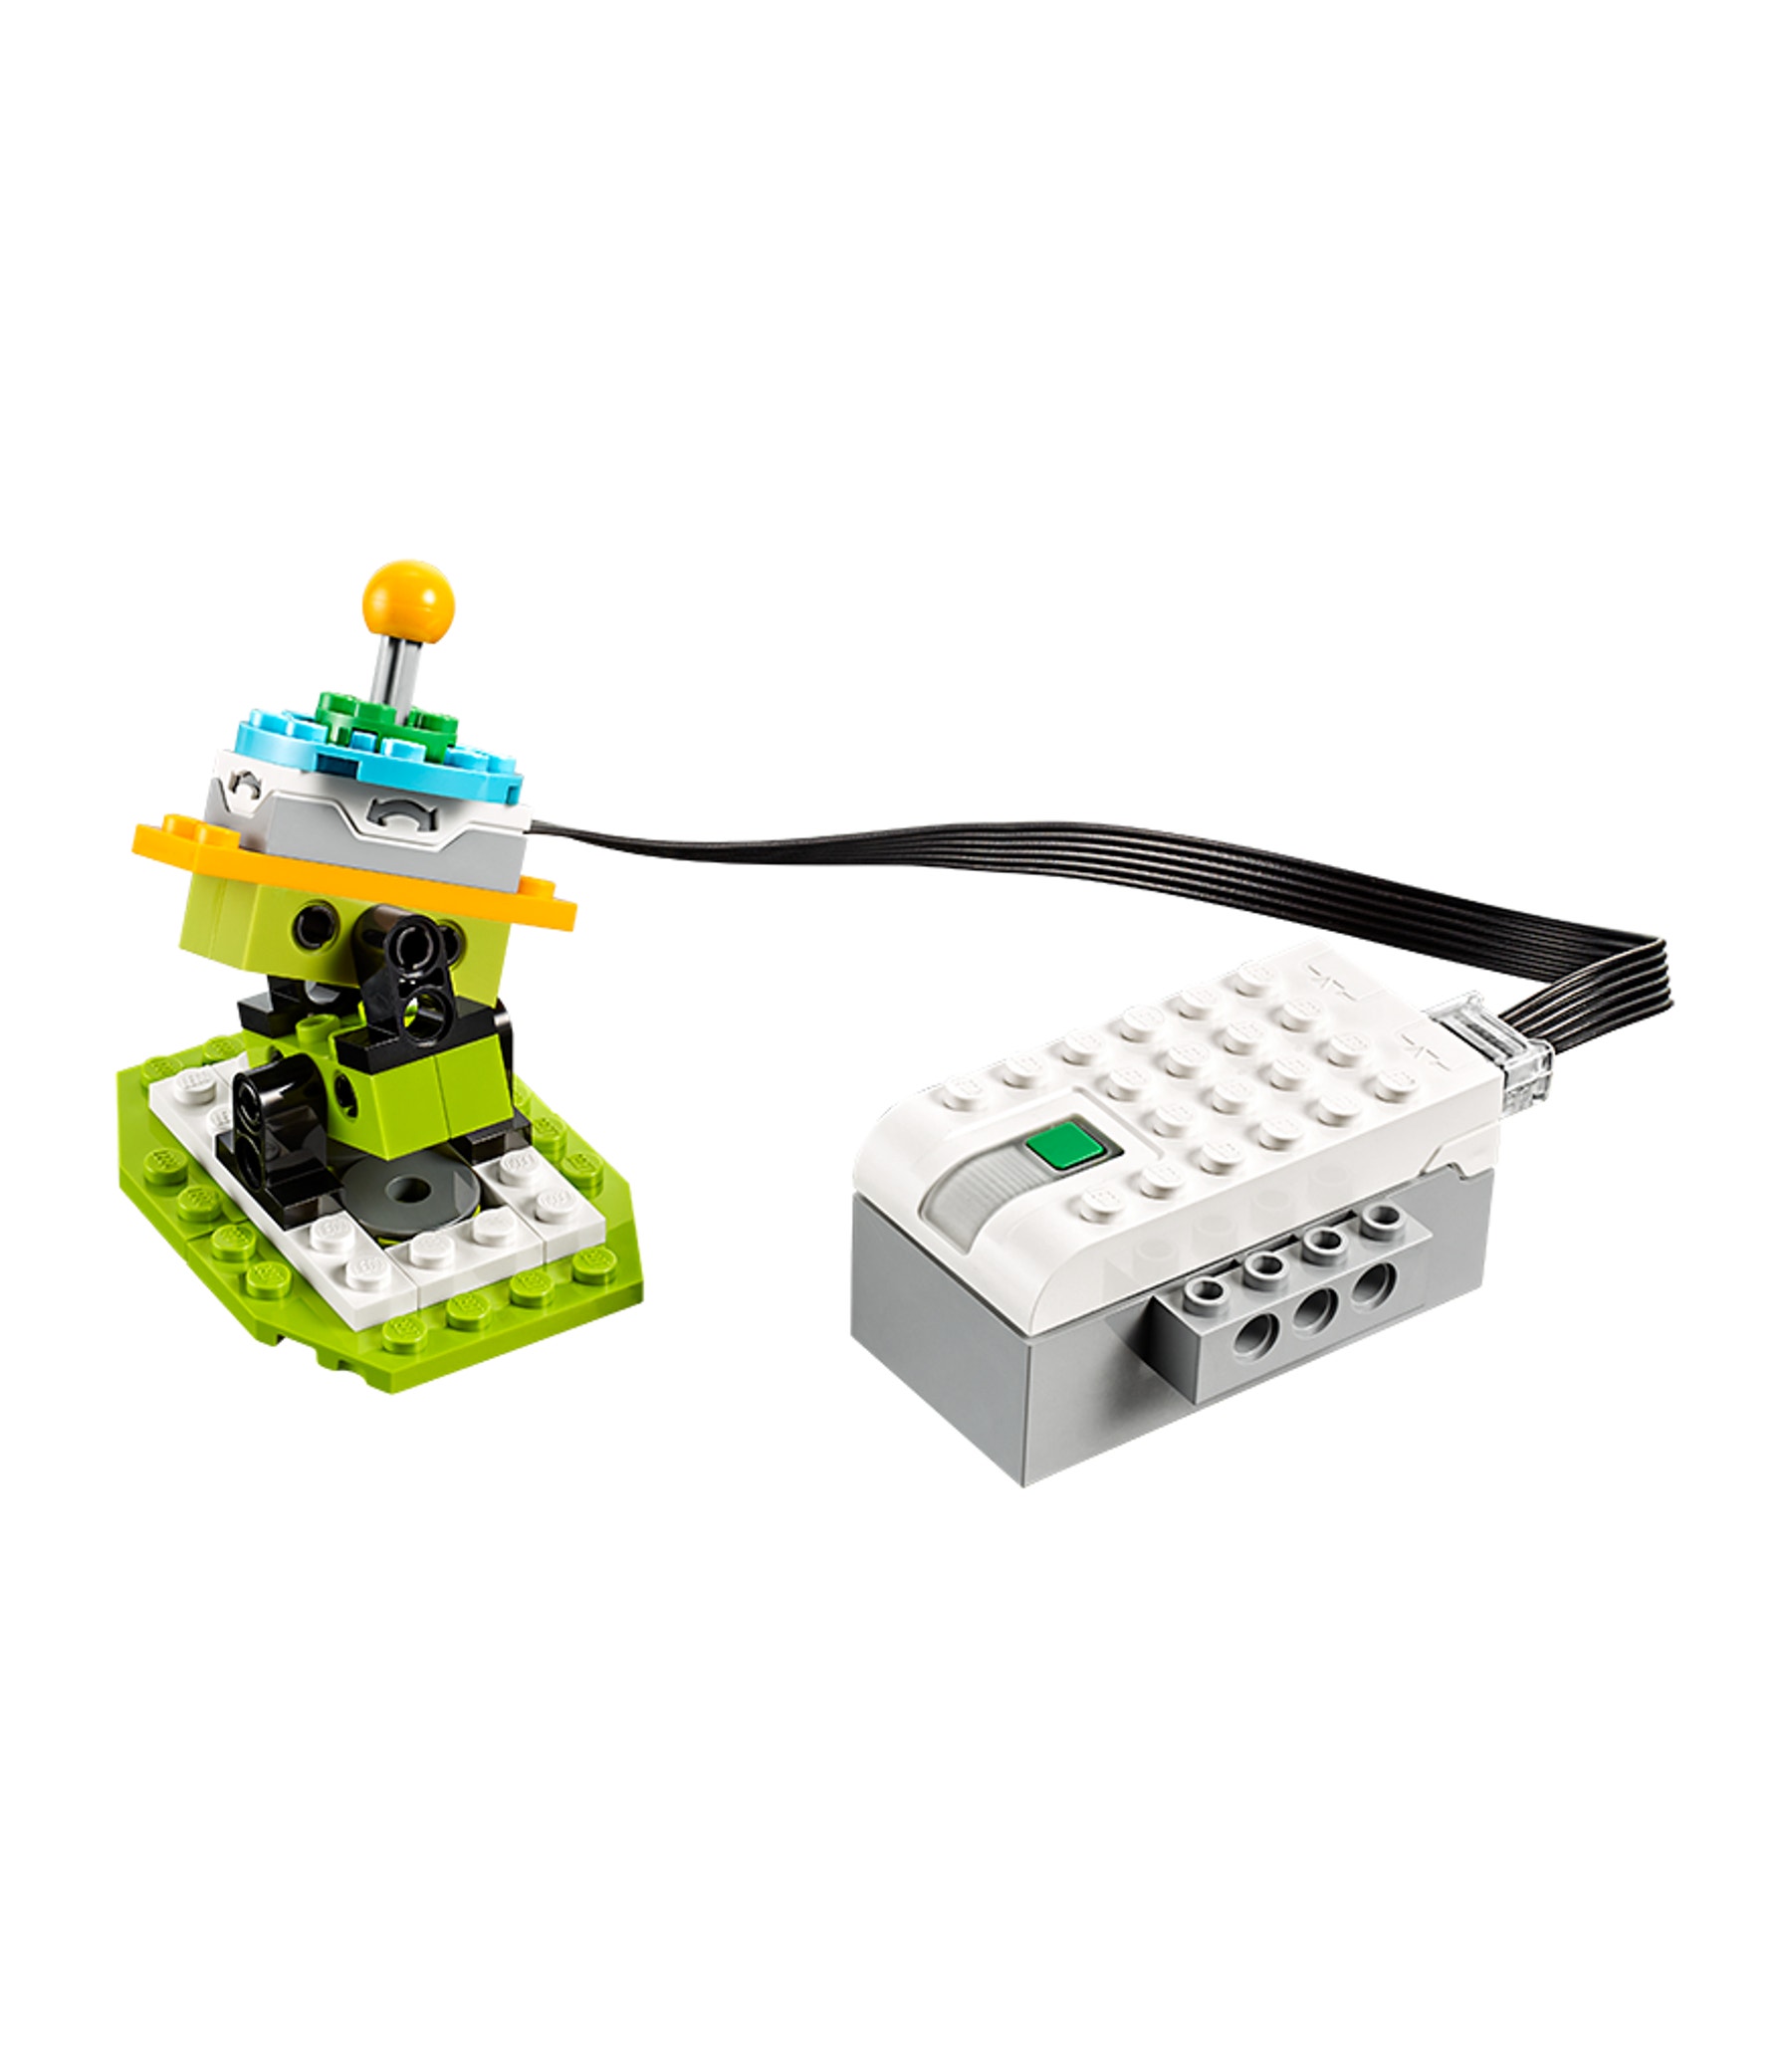
Build and program
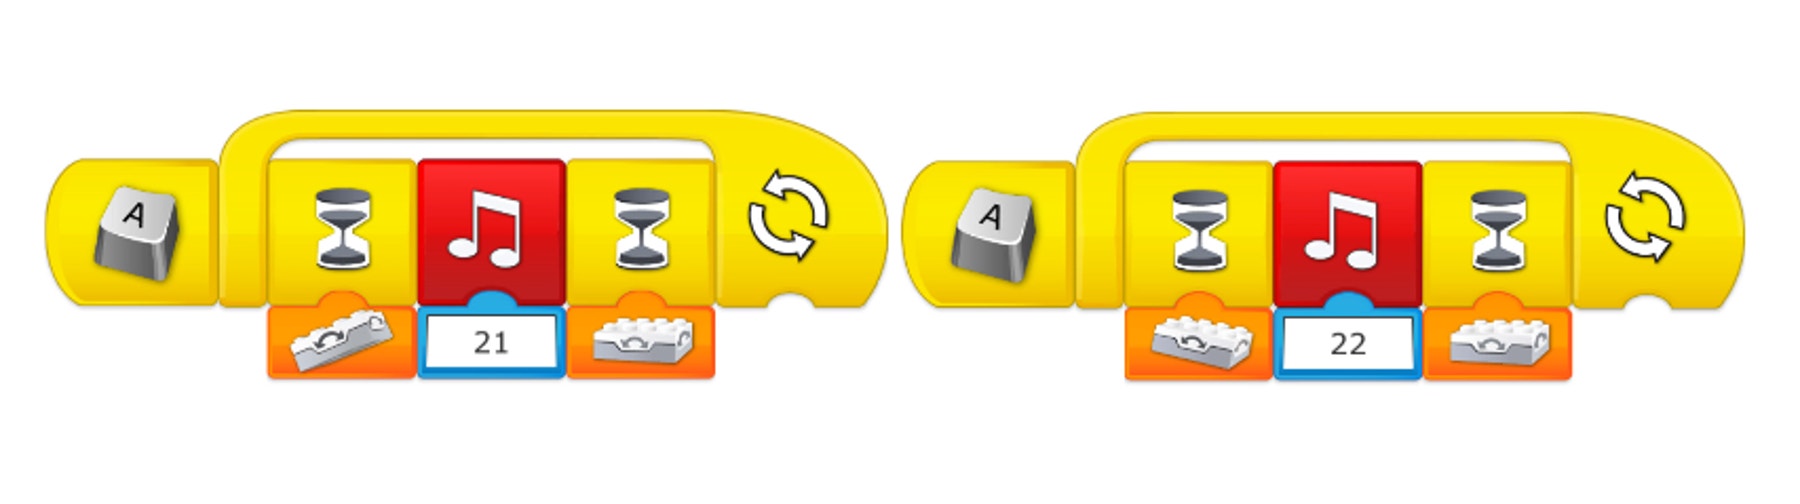
The students will build a joystick that uses a Tilt Sensor. The Tilt Sensor will detect the position in which the joystick is tilted. These positions are called ‘modes’. They can program a different output for each of these modes, such as playing a sound or displaying a color.
This program will enable your students to understand the behavior of the joystick. Allow some time for exploration and tinkering as your students become familiar with its movements.
Additional programming strings can be added to this program in order to activate other modes of the Tilt Sensor.
Plan and try a solution:
Using short and long sounds as codes, program your joystick to send a message.
For example: try to send the word ‘Max’ or ‘Mia’ using Morse code.
Try and modify your solution:
Program a message using your own signal system.
4. Share Phase
(45+ Minutes)
The students should take some time to compile the information that they have collected throughout this project.
Depending on which skill(s) you would like to focus on, you might ask each team or student for one or more of the following:
- A sketch of their strategy (Decomposition)
- A video of their robot (Evaluation)
- A video of them explaining their solution (Abstraction)
- A screen capture of their programming string (Algorithmic Thinking)
- An explanation of their program (Algorithmic Thinking)
- Pictures and explanations of some of the tests that they carried out during the project (Evaluation)
Organize a session in which each team can present a demonstration of their solution(s).
Teacher Support
Students will:
Explore how messages can be transferred from one place to another
Create and program a joystick that will allow you to send messages by using codes
Test your program and invent new ways to exchange information
Share your program and ideas for how to succeed in this project


