Illumination
Sofie thinks something is under her bed. Can you help her see it?
Prepare
(NOTE: This lesson contains a Part A and a Part B. Both are important to access the full learning of the curriculum. If time is limited, review both parts to choose elements that meet your students’ needs.)
In this lesson, the key learning occurs through observing the effect of light in a darkened space to discover that objects can only be seen when light is present. Students will build a torch model as a fun, hands-on way to make the observations. Examples are provided for inspiration. Encourage students to build their own ideas for a model torch.
If you decide to use a darkened room, prepare to support any students who may find this uncomfortable.
- Science Background - illumination: The focus for this lesson is that humans need light to see objects.
- Objects like the sun, fire, fireflies, light bulbs and electronic screens can be seen because they are sources of light that travel directly to the eye.
- Objects like the moon, the planets, most kinds of rocks and trees are not sources of light, so they can only be seen when they reflect or bounce, light from a light source into the eye.
- When light is detected by the eye, electrical signals are sent to the brain to be interpreted as images.
- Build Prior Knowledge - Illumination: Using your core science materials and the provided background, share information, images and definitions.
- Humans need light to see.
- Objects that make light are called light sources. The sun, other stars, lightning, campfires, candles, lamps and torches are examples of light sources.
- Objects that do not make light can only be seen if light shines on them. The moon, a basketball and a mouse are examples of objects that do not make their own light.
- Key vocabulary: light source
- Building and Programming Experience: Review the suggestions in the Unit Plan. For this lesson, you may also want to
- Use the Event and Light Blocks sections of the Help>Icon blocks menu in the SPIKE app to provide more support.
- Complete the Transparency lesson to build students’ familiarity with light.
- Materials: To support learning and light testing, students will need a darkened space and various materials.
- Darken your classroom or another room if possible.
- Alternatively, for testing create and use one or more pinhole viewers using a large cardboard box with a lid. Cut a small viewing hole in one end of the box.
- Place a secret object (or card showing a letter of the alphabet) in it.
- Students use the viewing hole to see into the darkened space.
- Develop a protocol for sharing the box to protect children’s eyes. This could be a square of cellophane placed over the pinhole before each child looks through it. The cellophane should be changed after each viewing.
PART A (45 minutes)
Engage
(Whole Class, 10 minutes)
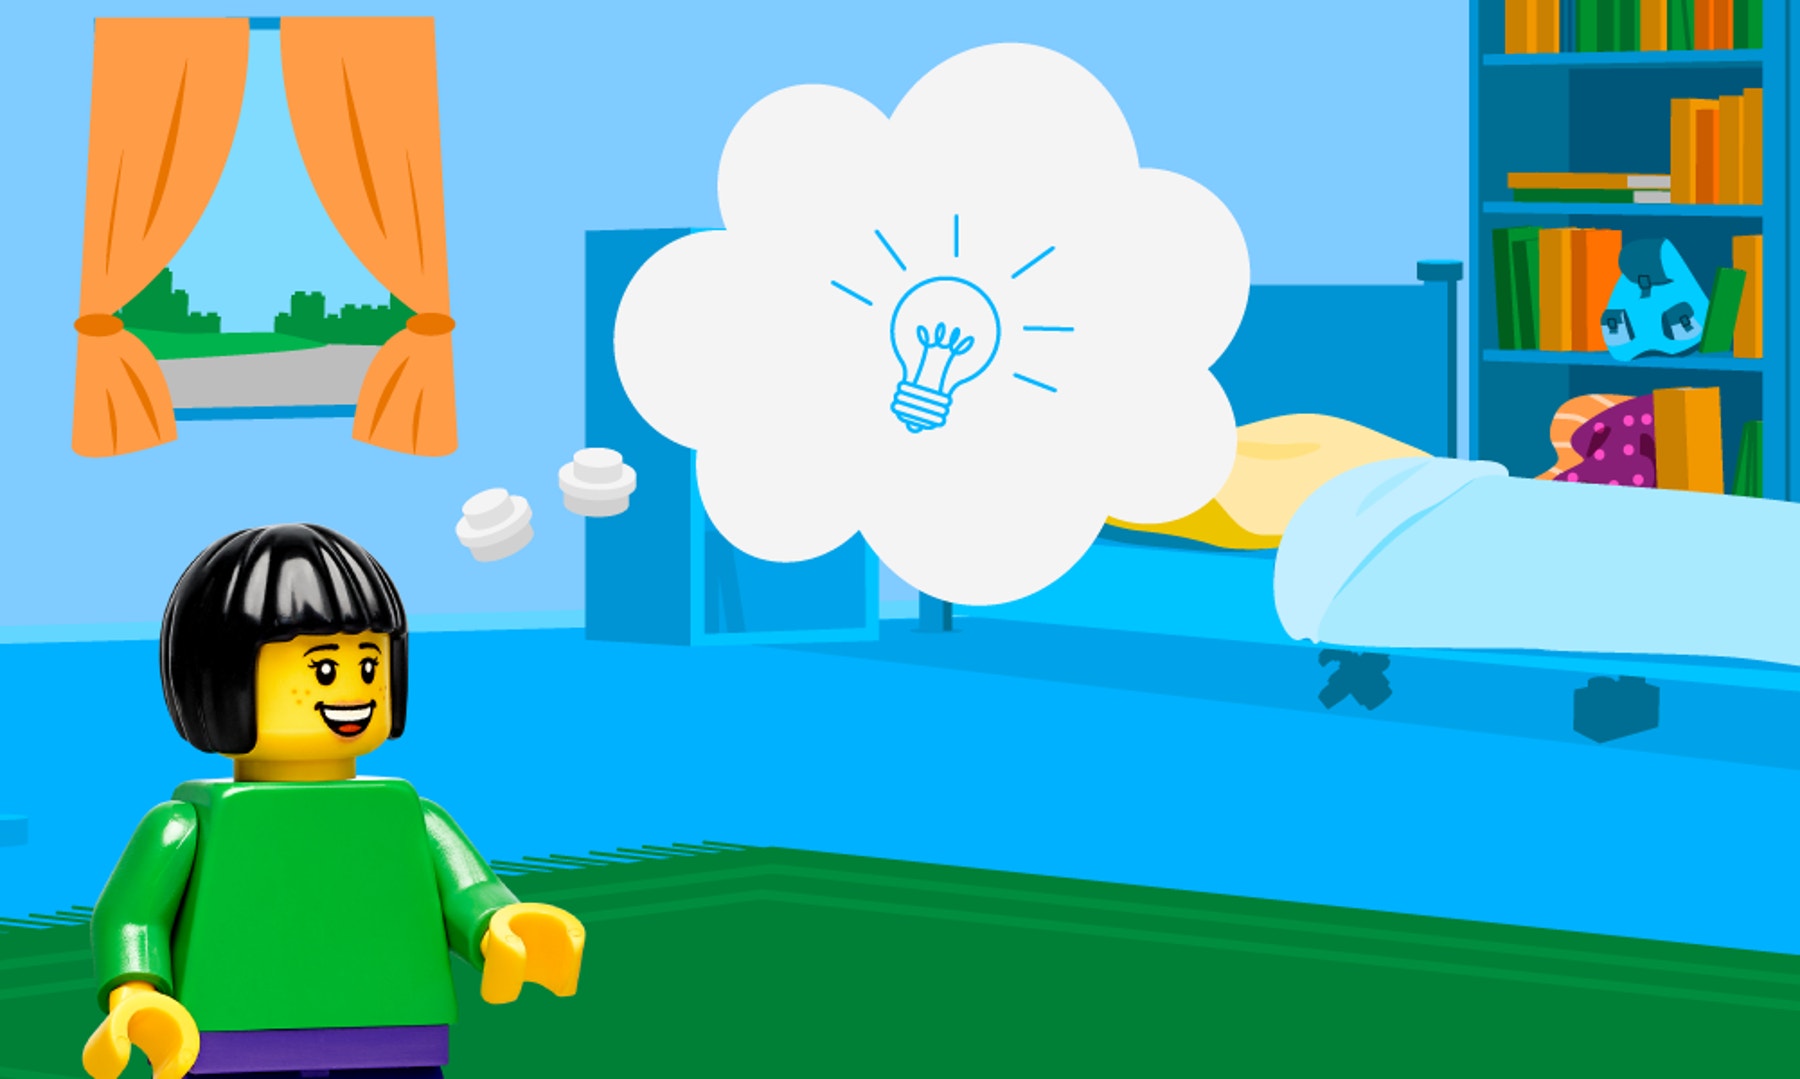
Introduce the story’s main character(s) and the first challenge: Sofie thinks something is under her bed. Can you help her see it?
THINK – Facilitate a brief discussion about the lesson topic(s) and the test, using a quick hands-on investigation and the story picture if you wish.
- Darken the room. Next, let light into the room. Then, darken the room again and use a torch to light up one corner. (Prepare students. Excuse or support those who are uncomfortable in a dark room.)
- What could you see in the darkened room? Why? (Not much, because there is no good light source)
- What can you see when the room is lit? Why? What are the light sources? (Everything in the room, because the light sources light up the objects; electrical light inside, possibly sunlight from outside)
- What could you see in a dark room with a torch shining in one corner? What helped you see? (objects in the corner, but the rest of the room was darker; the torch, because it lit up the corner)
- What does Sofie need to see the object under her bed? (She needs a light source under her bed. A torch would work.)
Distribute a LEGO® Education SPIKE™ Essential Set and a device to each group.
Explore
(Small Groups, 35 minutes)
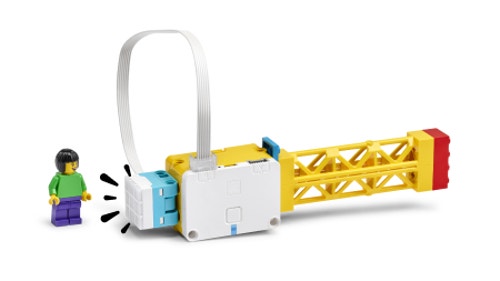
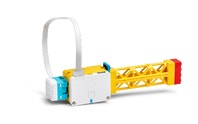
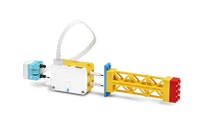
As students work, consider sharing the examples below as support for building or programming.
Clarify that the images show ideas for one model torch, but that students should build their own ideas for a torch.
Have students:
- Use the base model to BUILD a torch to help Sofie see the object under her bed.
- PROGRAM their model torch to light up an area or the inside of a pinhole viewer box.
Facilitate brainstorming about ways to use the matrix light in a torch. In order to see the object clearly, which light colour should we use? How many lights should we use on the matrix light? (White light will work best because other colours will affect the colours on the object. Light all nine matrix lights for best results.)
Example Ideas

- Have students test how well their torch lights up a dark space. (Clarify the process for creating a dark space or demonstrate use of the prepared pinhole box.)
- One at time, place each group’s torch inside the box and close the lid.
- Allow each partner to look through the pinhole and try to identify the object (or letter).
- Encourage students to write, draw or say what they observed.
- Halfway through work time, have students exchange ideas using a familiar classroom routine and then update their models with inspiration from sharing.
If you wish to continue to Part B – Explain, have students keep their models intact or allow time for rebuilding
.png?locale=en-au&auto=webp&format=jpeg&width=1800&quality=90&fit=bounds)
PART B (45 Minutes)
Explain
(Whole Class, 10 minutes)
- Gather students for sharing.
- Have them explain
- What did you see inside the box? (or What did you see in the dark?)
- Why did we need a dark space for our test? Why did we need a torch?
- How did your torch help you see the object?
Have students keep their models intact for use in Elaborate.
Elaborate
(Whole Class, 25 minutes)
- (5 min) Share background to help students Elaborate
- The torch you built made its own light, which caused the object to be seen in a space where there is no other light. Explore what happens when you change the amount of light.
- (15 min) Iterate and test to complete the next challenge in the app.
- Organise clusters of several groups to test further with new conditions. Ask students what happens under each condition:
- Many torches on the object
- Many lights not pointed at the object
- One torch not on the object
- No torch
- (Students will discover that shining brighter light on the object makes it even easier to see details of things that are both close to you and far away.)
- (5 min) Invite students to share knowledge, ideas or skills that
- Helped them complete the challenge.
- They learned while building.
- Have students clean up the sets and work areas.
Evaluate
(Whole Class, 10 minutes)
- Ask guiding questions to elicit students’ thinking and their decisions while ideating, building and programming.
Observation Checklist
Review the learning objectives (Teacher Support box).
Use the checklist to observe students’ progress:
- Their torch illuminates a mystery object when used in a darkened space.
- Their observations record when they could see the object.
- Their account uses evidence from their observations to explain that objects in darkness can be seen only when a light source shines on them.
Self-Assessment
Have each student choose the brick that they feel best represents their performance。
- Blue brick: I think I can follow instructions to create a program.
- Yellow brick: I can follow instructions to create a program.
- Green brick: I can follow instructions to create a program and I can help a friend do it too.
Peer Feedback
In their small groups, have your students discuss their experiences working together.
Encourage them to use statements like these:
- I liked it when you…
- I’d like to hear more about how you…
Differentiation
Simplify this lesson by:
- Providing scaffolded ways for students to express their observations in each test situation, using gesture (shake or nod, stand or sit), yes/no questions like Do you see the (card, object, letter) or pointing to/sorting pictures.
Increase the difficulty by: - Adding sensors to the model so you can control whether the light source is off or on.
Extension
- Brainstorm with students about light sources they might see outside a school or home window soon after it gets dark (streetlights, car headlights, neon signs, fireflies, stars). If students mention the moon as a light source, review that it’s actually reflecting light from the sun. It makes no light of its own. Have students create pages for an illustrated nighttime guide for their community. As needed, provide a page template with a window sentence frame such as I see ______________ outside. It makes light. Then have students count all the light sources. If appropriate to your students, use questions to support sorting into natural and human-made sources.
If facilitated, this will extend beyond the 45-minute lesson.
Teacher Support
Students will:
- Build a model torch that can illuminate darkened areas.
- Observe the effect of light on objects in a darkened space.
- Use evidence from observations to explain that objects can only be seen when light is present.
(one for every two students)
- LEGO® Education SPIKE™ Essential Set
- Device with the LEGO Education SPIKE App installed
- See Prepare - Materials.
ACSSU020 ACTDEK004 ACTDIP004 ACELY1656 ACMNA015 ACELY1661
Science (Physical Sciences)
Foundation to Year 2 Light and Sound:
ACSSU020: "Light and sound are produced by a range of sources and can be sensed."
Technologies (Design and Technologies)
Years F–2 Investigating and Designing:
ACTDEK004: "Explore the characteristics and properties of materials and components that are used to produce designed solutions."
Technologies (Digital Technologies)
Years F–2 Digital Implementation:
ACTDIP004: "Follow, describe and represent a sequence of steps and decisions (algorithms) needed to solve simple problems."
English (Literacy)
Year 1 Interacting with others:
ACELY1656: "Engage in conversations and discussions, using active listening behaviours, showing interest, and contributing ideas, information and questions."
Mathematics (Number and Algebra)
Year 1 Develop Strategies for Addition and Subtraction:
ACMNA015: "Represent and solve simple addition and subtraction problems using a range of strategies including counting on, partitioning and rearranging parts."
English (Literacy - Language Arts Extension)
Year 1 Creating Texts:
ACELY1661: "Create short imaginative and informative texts that show emerging use of appropriate text structure, sentence-level grammar, word choice, spelling, punctuation and appropriate multimodal elements, for example illustrations and diagrams."


