Prevent Flooding
Love using WeDo 2.0? Learn more about our next generation product, LEGO® Education SPIKE™ Essential.
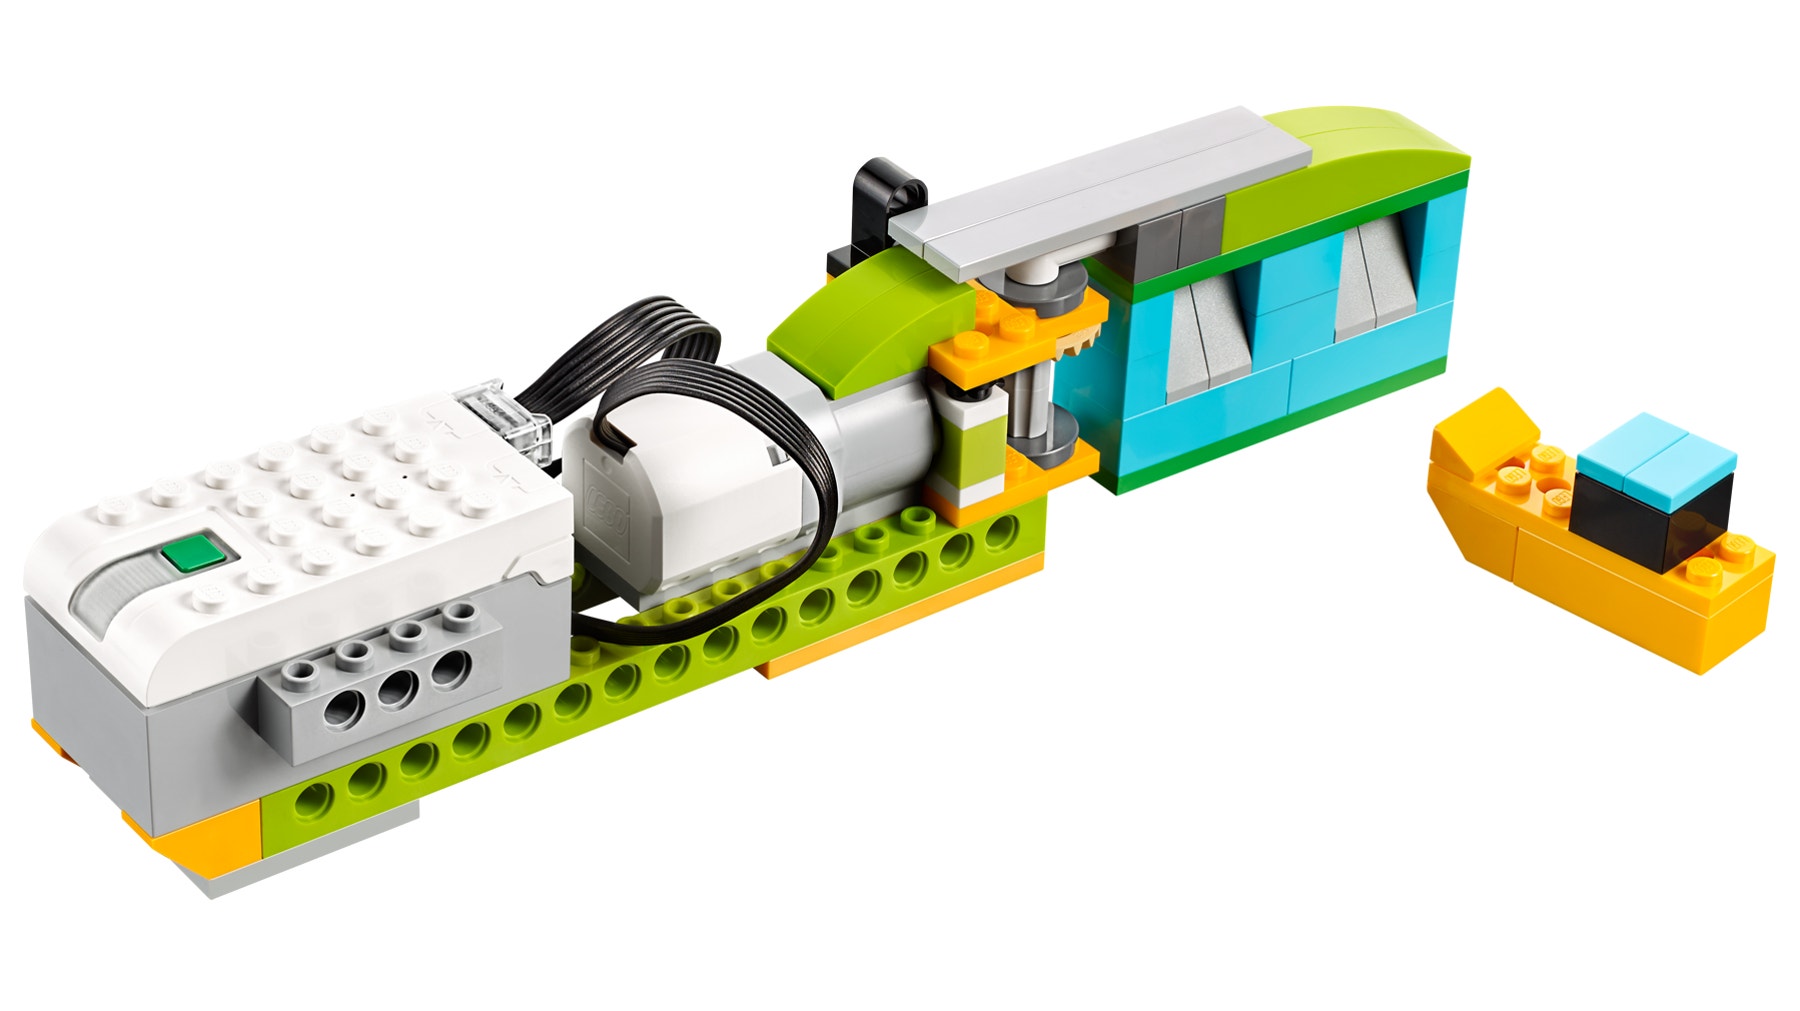
Design an automatic LEGO floodgate to control water according to various precipitation patterns.
1. Preparation
(15-30 minutes)
• Read the general preparation in the “Classroom Management” chapter.
• Read about the project so you have a good idea of what to do.
• Define how you want to introduce this project: Use the video provided in the project in the WeDo 2.0 Software, or use material of your own choice.
• Determine the end result of this project: the parameters to present and produce the document.
• Make sure timing allows for expectations to be met.
Important
This project is a design brief. Please refer to the “WeDo 2.0 in Curriculum” chapter for further explanations of design practices.
2. Explore phase
(30-60 minutes)
The introductory video may set the stage for the following ideas to be reviewed and discussed with students for this project.
Introductory video
Over centuries, humans have created devices to prevent water from flooding populated areas:
- Weather brings various types of precipitation during the year.
- Sometimes, there is so much water that rivers and streams cannot hold it all.
- Erosion is a natural phenomenon that happens often in areas that get a lot of precipitation.
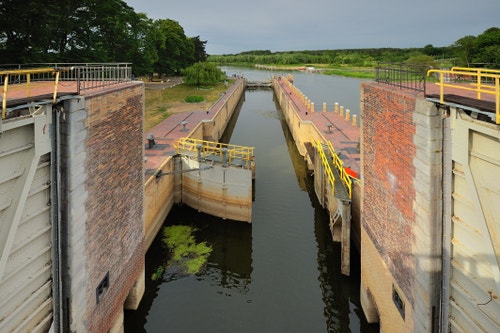
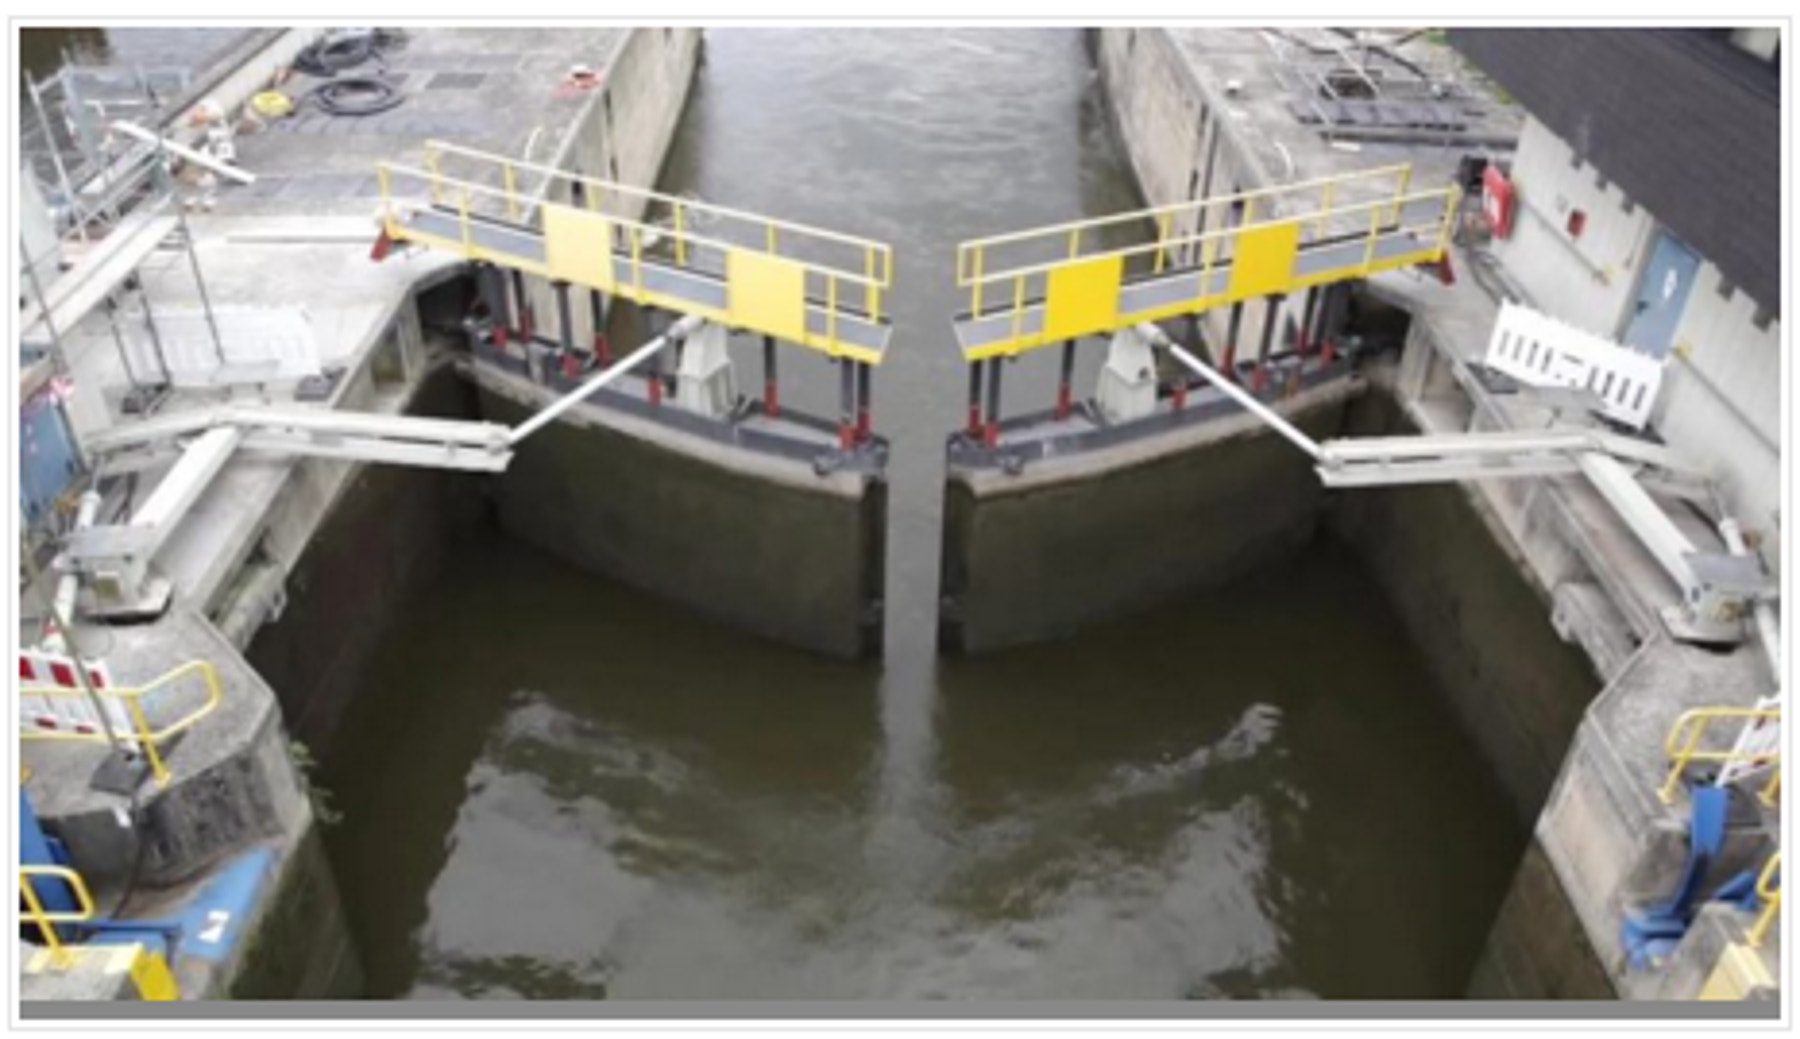
- Floodgates are devices that let water flow downstream in canals or rivers.
- When there is regular precipitation, the floodgates are open to keep the reservoir level low.
- In times of high precipitation, the floodgates are closed to fill the reservoir with the extra water.
You can compare the idea of floodgates to filling a bathtub:
• Opening the doors will allow more water from upstream to go down or from the faucet to the bathtub and then to the drain.
• Closing the floodgates completely will stop the water from draining away and would create a flood upstream—or fill your bathtub.
Questions for discussion
- Describe precipitation levels for each season in your area using a bar graph.
The answer to this question will vary according to your location. Use descriptive words such as high rain season, low rain season, and flooding. The bar should show high, low, or medium precipitation. - How does precipitation influence water levels in a river?
Precipitation is not the only factor influencing the water level of rivers, but generally:
• High precipitation raises the water level.
• Low precipitation lowers the water level. - List ways a flood can be prevented.
There are many ways humans prevent flooding: dikes, dams, trenches, reforestation, etc. - Imagine a device that can prevent flooding from happening.
The answer to this question will guide students to the design process. - What is water erosion?
Water erosion is a natural process by which water changes the shape of the land. - How is this bar graph different from one in your own region?
The answer to this question will vary according to the student’s location.
Have your students collect their answers with text or pictures in the Documentation tool.
3. Create phase
(45-60 Minutes)
Build and program a floodgate
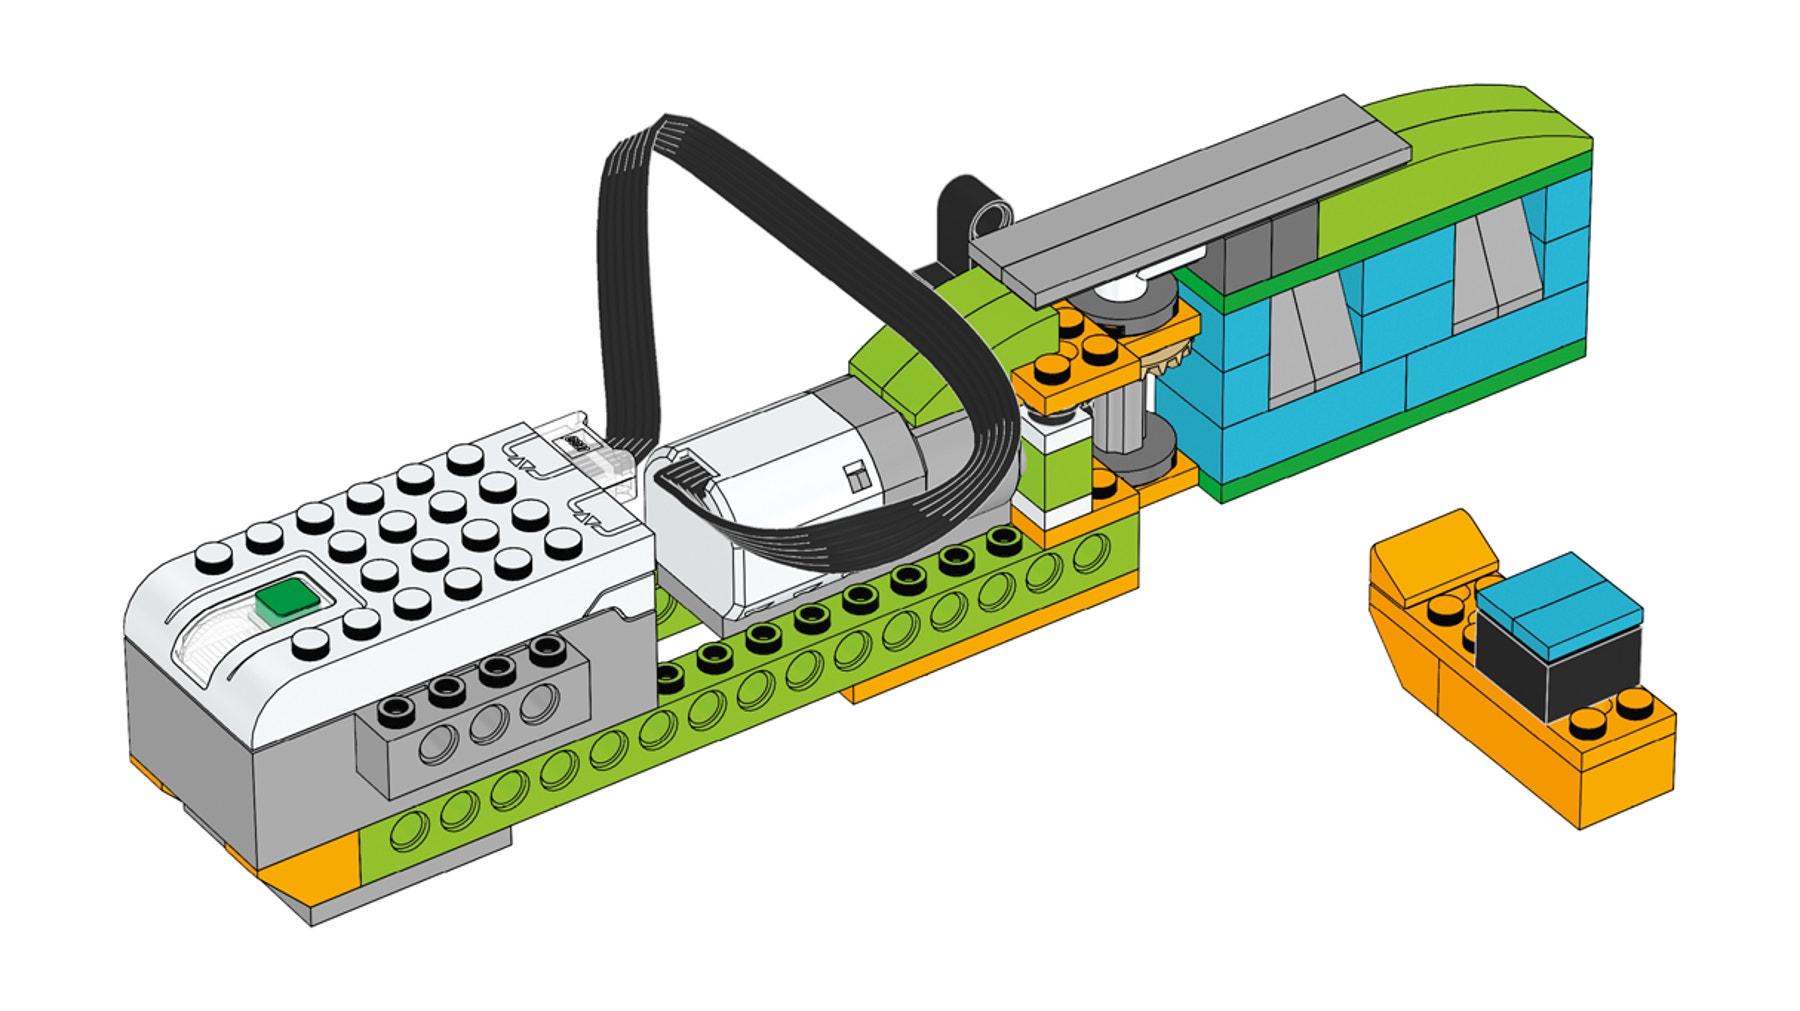
Students will follow the building instructions to create a floodgate. This gate can be closed and opened using the motor.
1. Build a floodgate.
The module used in the project uses a bevel gear. This bevel gear can change the axis of rotation, allowing the floodgate to open and close.
2. Program the model to open and close the floodgate.
This program will display the image of the precipitation and turn the motor on one way for 2 sec. Then it will display the image of the sun and turn the motor on the other way for 2 sec.

Important
The use of the bar graph should help students explain why they need to close or open the floodgate.
Suggestion
Before your students start designing solutions, have them change the parameters of the program so they fully understand it.
Automate the floodgate
Using this model, students should be able to add sensors to the model to make the floodgate react to its environment. They should consider at least one of these options:
1. Add a Tilt Sensor handle to operate the gate.
A Tilt Sensor handle will let an operator on the ground open and close the door.
2. Add a Motion Sensor to detect rising water.
A Motion Sensor will let you open and close the door according to water levels. Use your hands or LEGO bricks to simulate different water levels.
3. Add a Sound Sensor Input to activate emergency protocol.
The emergency protocol can be used to play a sound, flash the lights, send a text message, or close the floodgates.
Important
It is important to note that because a student model will vary according to student choice, there are no building instructions or sample programs provided to students for this part of the project.
Design further solutions (optional, 45-60 minutes)
Use the “Design further solutions” section of the student project as an optional extension. Keep in mind that these tasks extend upon those of the previous section and are designed for older or more advanced students.
Flooding and erosion do not just happen anywhere.
1. Draw a map of the floodgate location, including the land and river areas:
• Ask your students to create a map or a display of the river with other elements, such as mountains, valleys, cities, etc.
• Ask them to describe where a floodgate might be used.
• Ask them to illustrate where the water is coming from and where it goes.
2. Find other uses for a floodgate.
You could use the floodgate in other situations than a flood. Have your students think of gates or a door in general.
Collaboration suggestion
The floodgate can also be used in a canal navigation scenario. Pair up teams so they can illustrate what might happen in a boat transportation sequence.
3. Program two floodgates to control navigation of water in and out of a section of the river.
Have your students describe and program the sequence for operating the floodgates.
4. Share phase
(45+ minutes)
Complete the document
Have students document their projects in different ways:
• Ask students to take photos of each version they create. Get them to explain which is the best solution and provide evidence for their reasoning.
• Ask your students to compare these images with real-life images.
• Ask your students to record a video of themselves describing their projects.
Present results
In this specific project, have students present how their floodgate works with the use of a sensor.
To enhance students’ presentations:
• Make sure they can explain why the floodgates can prevent water from changing the shape of the land.
• Ask them to put their explanation into context: Where is this happening?
In what season? Under what conditions?
Project assessment
NGSS project assessment rubrics
You can use these assessment rubrics with the observation rubrics grid, which you will find in the “Assess with WeDo 2.0” chapter.
Explore phase
During the Explore phase, make sure the student is actively involved in the discussion, asking and answering questions, and can create a graph of precipitation for each season.
- The student is unable to provide answers to questions or participate in discussions adequately or create a graph of precipitation for each season.
- The student is able, with prompting, to provide answers to questions or participate in discussions adequately or with help and create a graph of precipitation for each season.
- The student is able to provide adequate answers to questions and participate in class discussion and create a graph of precipitation for each season.
- The student is able to extend the explanations in discussion and create a graph of precipitation for each season.
Create phase
During the Create phase, make sure the student works well on a team, justifies his/her best solution, and uses the information collected in the Explore phase.
- The student is unable to work well on a team, justify solutions, and use information collected for further development.
- The student is able to work on a team, collect and use information with guidance, or, with help, to justify solutions.
- The student is able to work on a team and contribute to the team discussions, justify solutions, and collect and use information about the content.
- The student is able to work on a team and serve as the leader and justify and discuss solutions that allow for the collection and use of information.
Share phase
During the Share phase, make sure the student can explain how the new design for the floodgate was created, has used sensors to control the floodgate, and can use important information from the project to create a final report.
- The student is unable to engage in the discussions about the design or explain the model using sensors and use the information to create a final project.
- The student is able, with prompting, to engage in the discussions about the design of the floodgate and the use of sensors and use limited information to create a final project.
- The student is able to engage in discussions about the design of the floodgate and the use of sensors and use the information gathered to produce a final project.
- The student is able to engage extensively in class discussions about the topic and use information gathered to create a final project that includes additional required elements.
ELA project assessment rubrics
You can use these assessment rubrics with the observation rubrics grid, which you will find in the “Assess with WeDo 2.0” chapter.
Explore phase
During the Explore phase, make sure the student can effectively explain his/her own ideas and comprehension related to the questions posed.
- The student is unable to share his/her ideas related to the questions posed during the Explore phase.
- The student is able, with prompting, to share his/her ideas related to the questions posed during the Explore phase.
- The student adequately expresses his/her ideas related to the questions posed during the Explore phase.
- The student uses details to extend explanations of his/her ideas related to the questions posed during the Explore phase.
Create phase
During the Create phase, make sure the student makes appropriate choices (i.e., screen capture, image, video, text) and follows the established expectations for documenting findings.
- The student fails to document findings throughout the investigation.
- The student gathers documentation of his/her findings, but documentation is incomplete or does not follow all of the expectations established.
- The student adequately documents findings for each component of the investigation and makes appropriate choices in selections.
- The student uses a variety of appropriate methods for documentation and exceeds the established expectations.
Share phase
During the Share phase, make sure the student uses evidence from his/her own findings during the investigation to justify his/her reasoning. The student adheres to established guidelines for presenting findings to the audience.
- The student does not use evidence from his/her findings in connection with ideas shared during the presentation. The student does not follow established guidelines.
- The student uses some evidence from his/her findings, but the justification is limited. Established guidelines are generally followed but may be lacking in one or more areas.
- The student adequately provides evidence to justify his/her findings and follows established guidelines for presenting.
- The student fully discusses his/her findings and thoroughly utilizes appropriate evidence to justify his/her reasoning while following all established guidelines.
5. Differentiation
To ensure success, consider giving more guidance on building and programming, such as:
• Explain how to use sensors.
• Define the types of precipitation in each season with your students and help them determine which one to focus on.
• Explain engineering-based design.
Also, be specific about how you would like them to present and document their findings, such as with a sharing session among teams, for example.
Suggestion
For more experienced students, you may want to allow them extra time for building and programming to allow them to create different and more extensive types of devices. Ask them to use the design process to explain all the versions they made.
Design further solutions
To design further solutions, ask the students to use their knowledge of the floodgate and different water sources to describe the stream of water they are trying to control and the position of mountains, cities, and lakes. Provide them with opportunities to expand the design process to include other ideas about how floodgates function or other automatic types of doors.
Students’ misconceptions
Students tend to view the earth as static, stable, and unchanging. They often have difficulty believing that rocks can change or be worn down through the process of weathering. They often have difficulty understanding the role of a dam or floodgate in the protection of land masses.
Teacher Support
Students will:
Explore various ways that precipitation can change over seasons and how water can cause damage if it is not controlled.
Create and program a floodgate to control the water level of a river.
Present and document multiple solutions designed to prevent water from changing the shape of the land.
NGSS
2-ESS2-1
3-ESS2-1
3-ESS3-1
4-ESS2-2
CCSS
CCSS.ELA-Literacy.W.2.7
CCSS.ELA-Literacy.SL.3.1.a
CCSS.ELA-Literacy.RL3.7


