Catapult
Explore and recognize that the effectiveness of a lever depends on the arrangement of the pivot point, effort and load.
Connect
(5-10 Minutes)
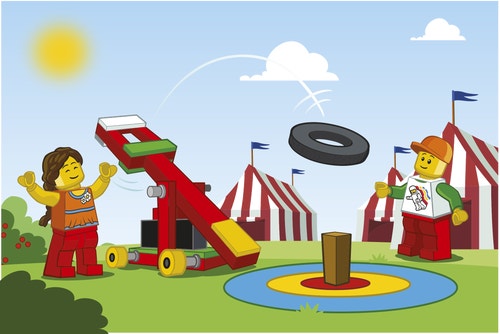
Sam and Sally love going to the fair. There is a catapult game, where players shoot at a goal to win prizes by scoring most points. Sam and Sally love competing against their friends and families!
Do you like playing games where you have to aim at a goal?
What do you enjoy most about them?
Which simple machine is needed for a catapult to work?
Let’s build a catapult!

Construct
(10-15 Minutes)
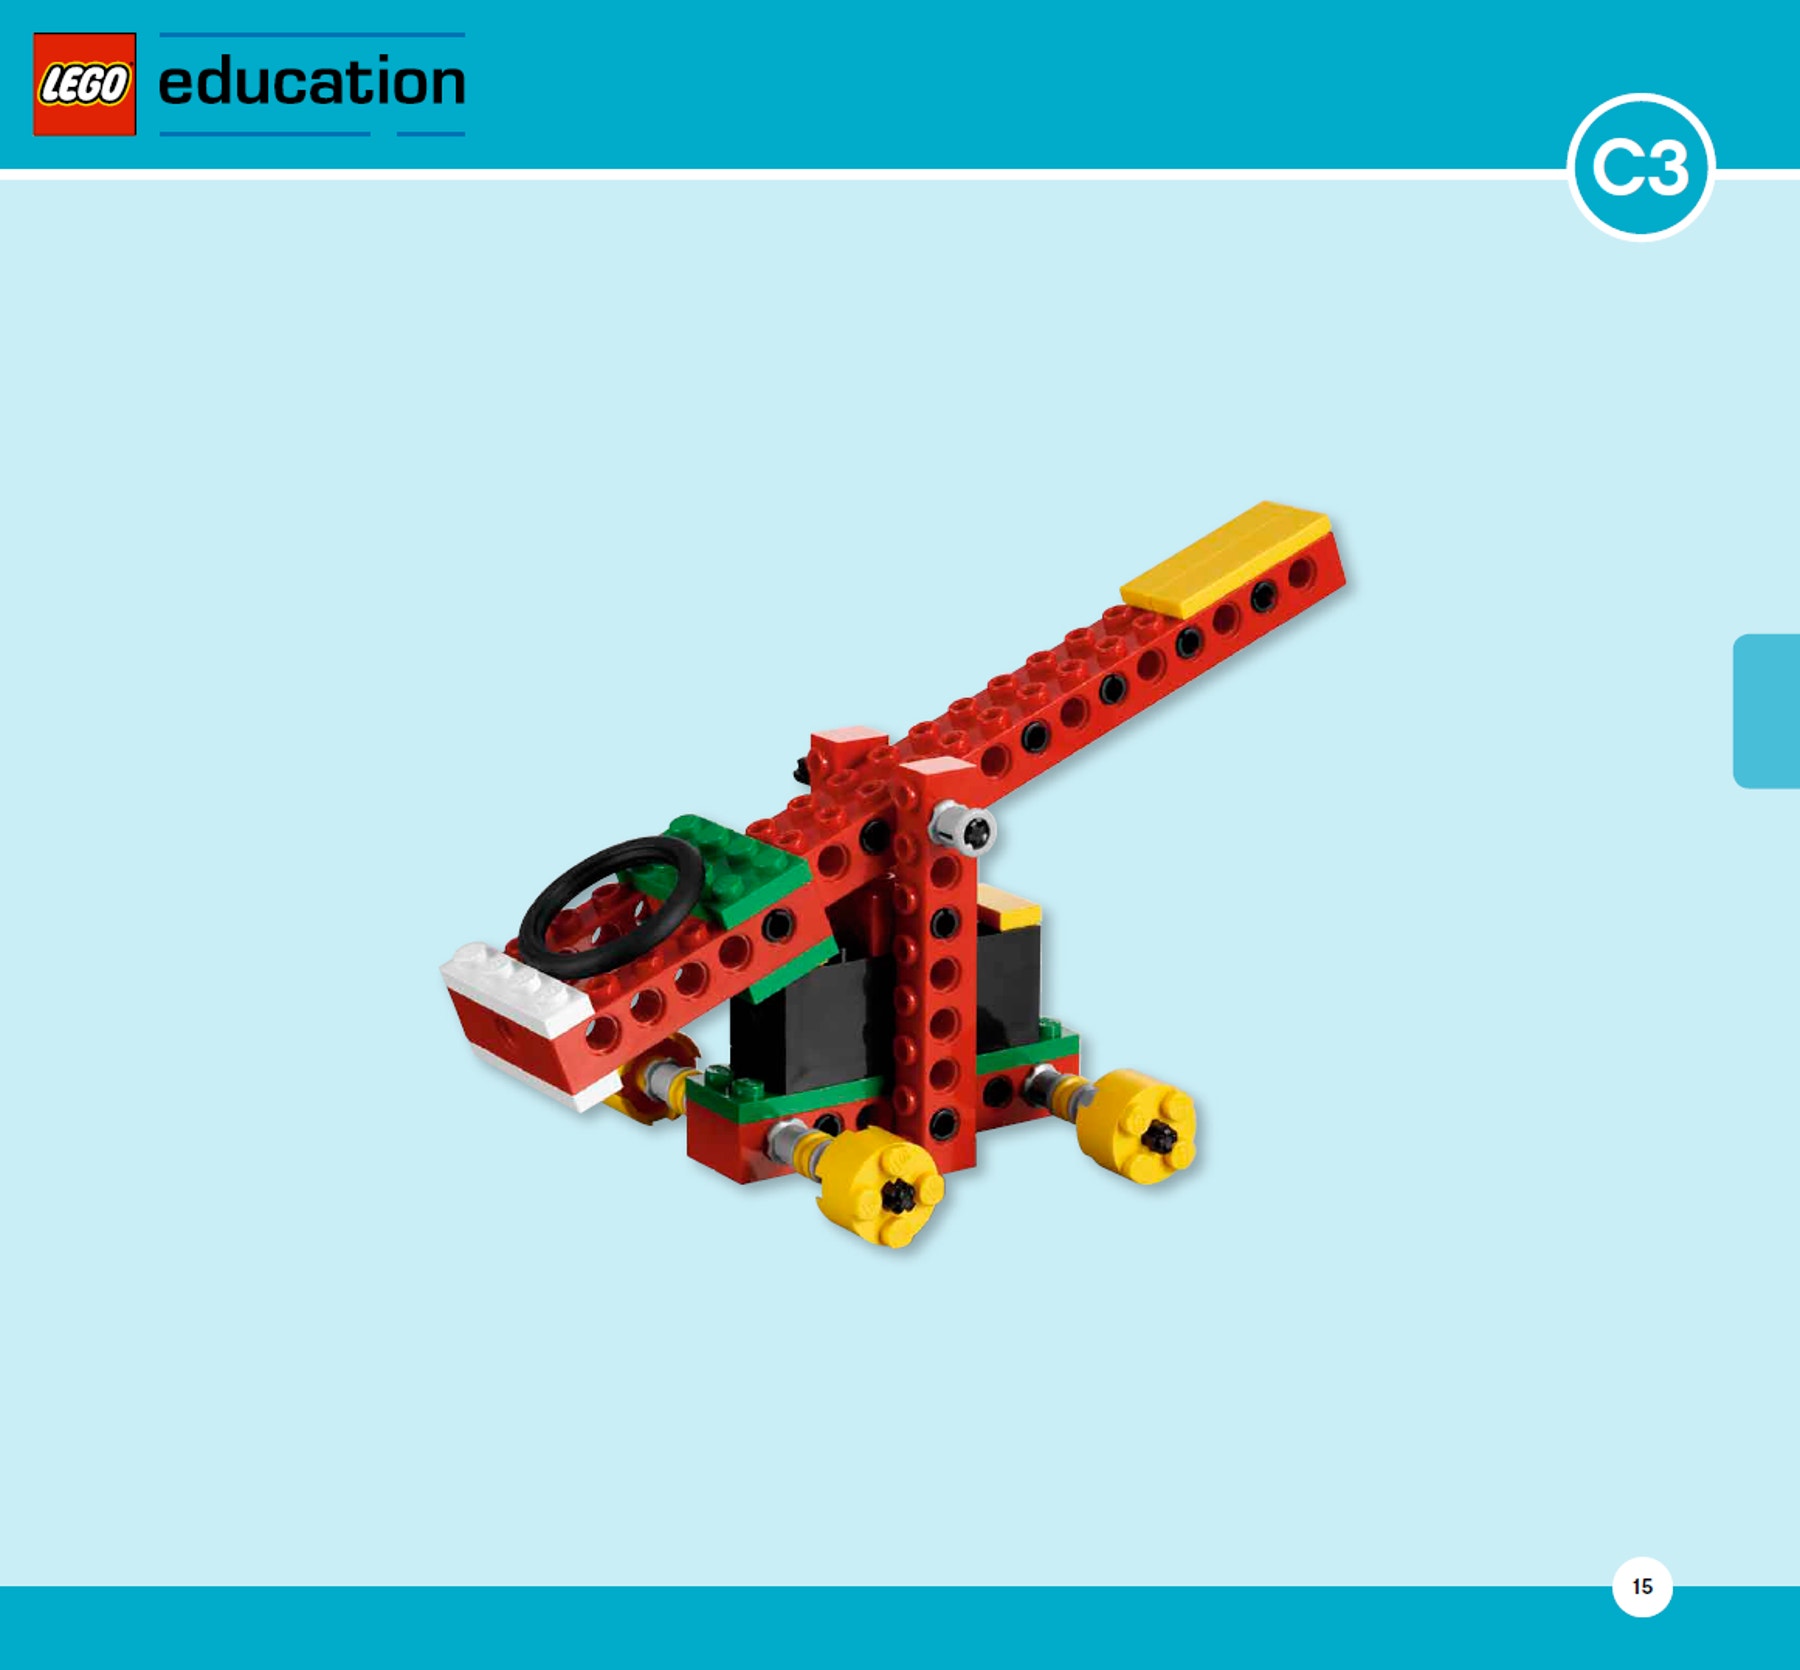
1. First, build Catapult Model C3 and try it out.
Follow Building Instructions C, pages 16 to 30, steps 1 to 16.
Warning! This may be dangerous!
Warning
Be careful not to let students point the catapult toward anybody’s face when catapulting the rubber tire.
Hint
Place one hand on the side of the catapult when catapulting the rubber tire. To avoid any risk of students getting hit, make sure all the class know which direction the catapult is to be fired in.

Contemplate
(10-15 minutes)
2. Label the model; draw lines from the words to the model.
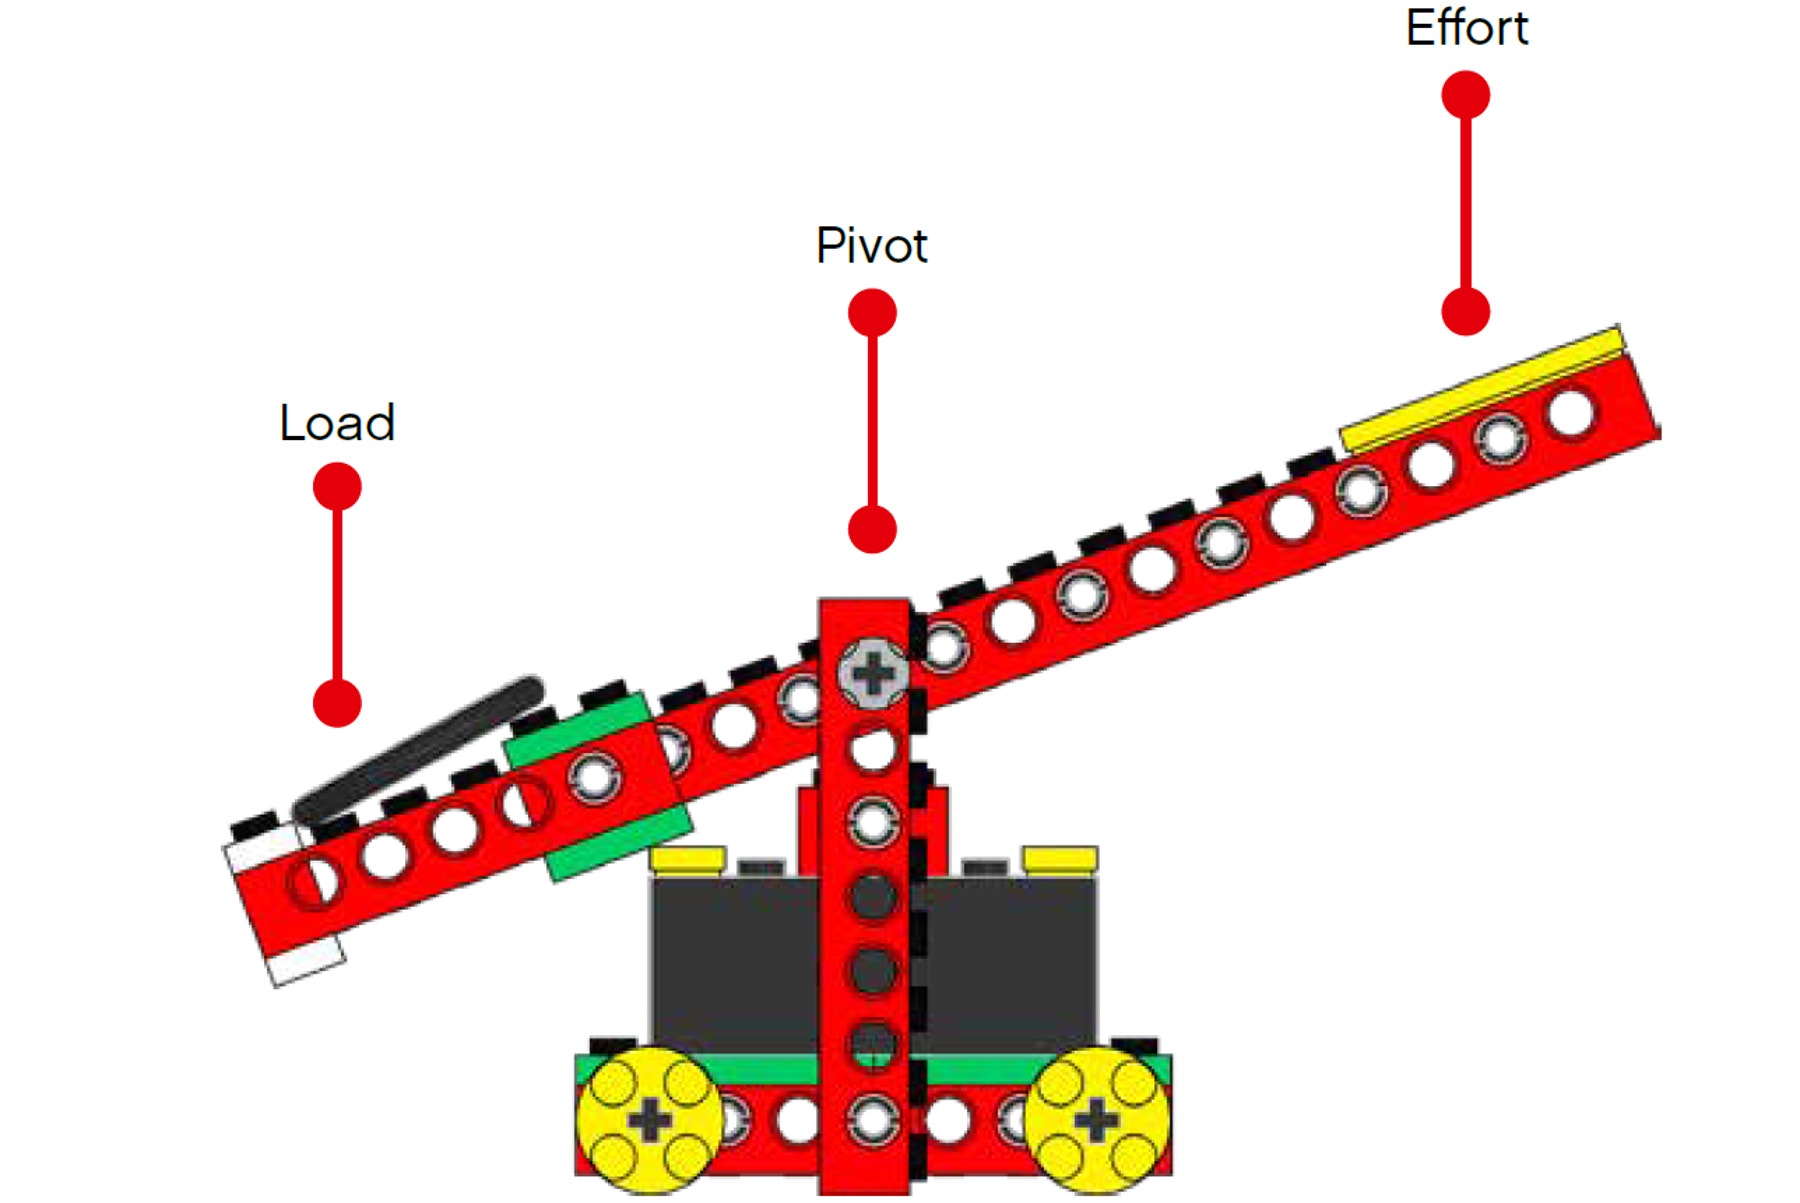
Which class of lever is the catapult?
The catapult is a first class lever, which has the pivot positioned between the effort and the load.
3. Then, look carefully at the pictures of the models and compare Catapult Model C3 to Catapult Model C4.
Count how many LEGO® studs or holes there are on the lever beam from the pivot to the load in the two models.
What do you notice? Explain how the two models are different.
Students should notice that even though both catapults are first class levers, the lengths from the load to the pivot differ in model C3 and model C4.
4. Next, look carefully at the pictures of the models and make a prediction.
If I compare model C3 to model C4, then I think Catapult Model (C3/C4) will throw the tire further.
Encourage students to discuss the effects the different lengths between the load and the pivot will have on the catapults in their own words. For the prediction, the correct answer is model C4; however, it does not matter whether students get the answer right or wrong at this point, only that they should make a prediction that can be checked later. Even though many variables will affect the catapult - especially the amount of effort used - model C4 should still throw further than C3, because the beam is longer from the load to the pivot in model C4.
5. Test Catapult Model C3.
Have students observe the starting place of the lever, including the lever beam, the pivot and the load on the catapult. Encourage them to try more than once, to ensure that their observations are correct. Students must write their measurements on the student worksheet.
Note
If possible, keep an example of Catapult Model C3 for students to compare with Catapult Model C4.
6. Build Catapult Model C4 and try it out.
Follow Building Instructions C, page 32, step 1.
Encourage students to identify parts while they are trying the model. Students should be asked to count how many LEGO® studs there are from the pivot to the load.
7. Test Catapult Model C4.
Encourage students to try more than once, to ensure that their observations are correct. Students must write their measurements on the student worksheet.
8. Finally, draw a conclusion and check your prediction.
Catapult Model C4 throws the furthest because of the distance between the pivot and the load.
9. Assessment
Students use the self-assessment rubric to evaluate their work. Each rubric includes four levels of achievement. The intention is to help students reflect on what they have done well and what they could have done better.
Continue
(10-15 Minutes)
Students are encouraged to make a game with rules that they can play using the catapult.
Note
There are no building instructions included to guide students through the Continue phase, other than the illustrated suggestions on the student worksheet.
Encourage your students to discuss the importance of agreeing on rules for the game before playing, prompting them with questions such as:
What is the aim of the game?
Describe what happens if you miss.
How many times are you allowed to try?
Describe how you can win the game.
How will you make sure your rules are followed?
It is suggested that students create a sign explaining the rules and inviting people to play the game.
Optional
It is suggested that students should draw different items where they find levers used in everyday machines and mechanisms.
Teacher Support
Students will investigate:
Pivot, effort and load
First class levers
Measure with standard units of measure
Predict outcomes of various trials
NGSS
Disciplinary Core Ideas: Physical Science
MS-PS2 Motion and Stability: Forces and Interactions
Crosscutting Concepts
Cause and effect: Mechanism and explanation
Systems and system models
Structure and Function
Stability and change
Science and Engineering Practices
Asking questions and Defining Problems
Developing and using models
Planning and carrying out investigations
Analyzing and interpreting data
Using mathematics, Informational and Computer Technology, and computational thinking
Constructing explanations and designing solutions
Engaging in argument from evidence
Obtaining, evaluating, and communicating information
Common Core State Standards Mathematics
Standards for Mathematical Practice
MP1 / MP2 / MP3 / MP4/ MP5 / MP6 / MP7/ MP8
Measurement & Data
3.MD.B.4
Writing Standards
W.3.2 / W.4.2 / W.5.2
Common Core State Standards English Language Arts
SL.3.1 / SL.4.1 / SL.4.3 / SL.5.1
Student Material
Share with:
 Google Classroom


